
Individual buying guide · 1981–1992
Volkswagen Scirocco Mk2 Buying Guide
I’ve owned and driven Mk2 Sciroccos for around 30 years. My first car was a Helios Blue 1986 1.6 GT and I’ve had a soft spot for them ever since.
They aren’t fast by modern standards, but that isn’t really the point. They look great, they’re simple to work on, most routine mechanical parts are cheap and there’s loads of room around the engine compared with a modern car.
That simplicity is probably what I like most about them. I’ve bought cars that had been off the road for years and got them running and driving again without specialist equipment or spending a fortune. You still need to buy carefully, especially where bodywork, missing trim and badly executed modifications are concerned, but a fundamentally good Mk2 Scirocco is one of the most approachable classics I know.
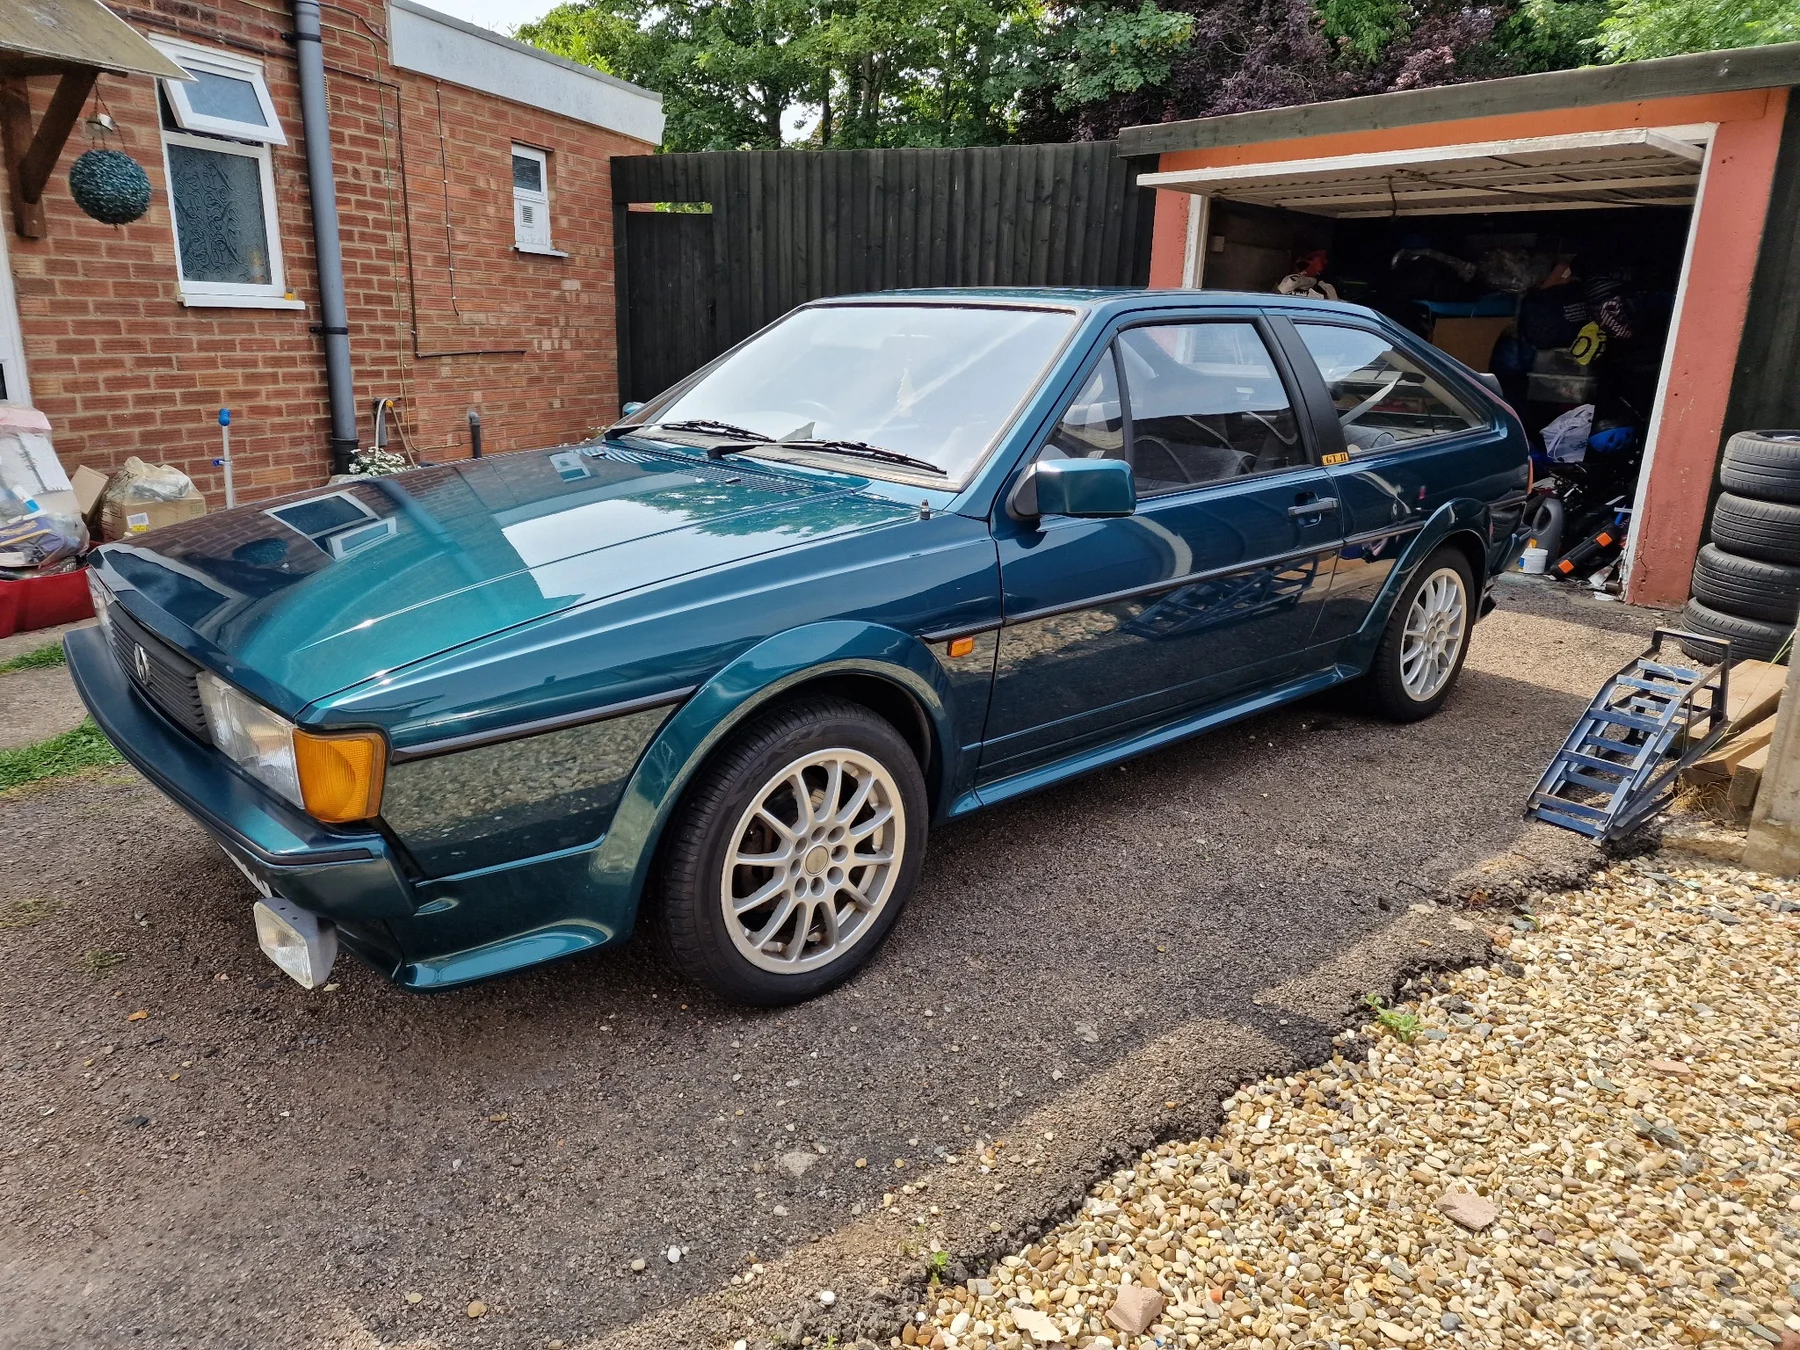
At a glance
1981–1992 (Type 53B)
Three-door coupé
Carburettor or Bosch K-Jetronic mechanical injection, depending on version
GT, GTX, Scala and GT II
Four- or five-speed manual, including the economy-geared 4+E, plus a three-speed automatic
Front discs and rear drums. Rear discs normally mean a conversion or an imported 16V specification
UK versions and fuel systems
The UK range changed several times. GT and GT II cars used carburettor engines, GTX models used Bosch K-Jetronic injection, and the Scala appeared first as a carburettor car and later with K-Jetronic. Check the year, engine code and period specification rather than relying on the badge alone.
The injected cars are the quicker factory option, but personally I still prefer a manual carburettor car. The real-world difference between a healthy EX and DX isn’t enormous, and the carb setup is much easier to understand and work on at home.
A properly sorted K-Jetronic car can run brilliantly, but fuel-pressure and warm-up faults need proper diagnosis rather than trial and error. Some K-Jet-specific parts are also becoming harder to find, which is another reason I like the simplicity of the carb cars.
Carburettor engines
The 1.8 EX normally used a Pierburg 2E2. The original carb can work perfectly well when it’s set up properly, but after more than 35 years many have been adjusted, rebuilt or bodged more than once. Start the car from cold, watch the automatic choke and make sure the idle settles as it warms.
If I had a troublesome original carb, I would personally fit a properly installed Weber 32/34 DMTL manual-choke conversion rather than spend hours chasing an ageing automatic-choke problem. A good conversion needs the correct adaptor, linkage, choke cable and jetting. A badly fitted Weber can create just as many problems as the carb it replaced.
On a carb car I also normally replace the mechanical fuel pump and vapour separator when I’m establishing a baseline. They’re inexpensive parts and the jobs are simple enough that I would rather know they’re good than wait for an old component to cause fuel-supply problems.
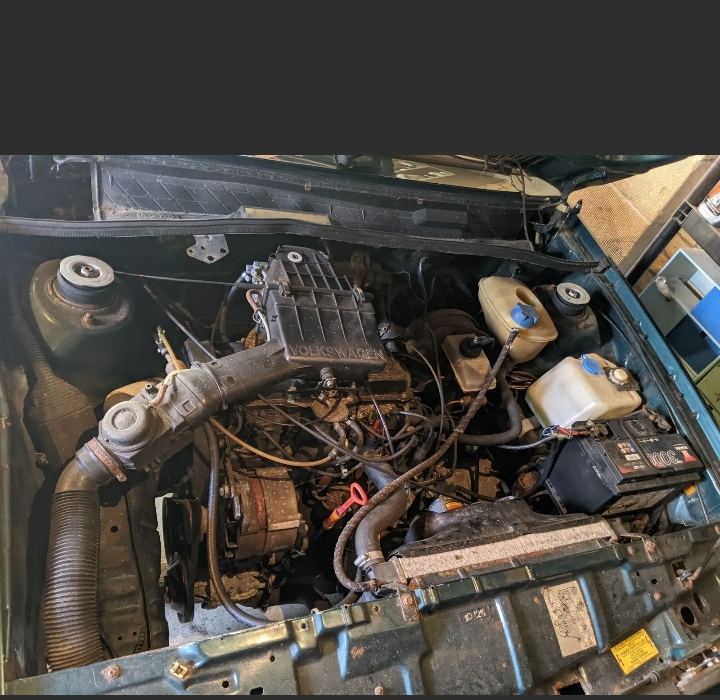
Carburettor and fuel system
Where to look
Choke operation, vacuum hoses, the mounting flange, fuel hoses, vapour separator and signs of a previous conversion.
What good looks like
A clean cold start, an idle that settles as it warms, smooth acceleration and dry, securely fitted hoses and linkages.
Warning signs
A sticking choke, persistent hesitation, split hoses, fuel leaks, heavy sealant or disconnected components.
What would concern me
A car that needs constant throttle to run, or a conversion without the correct adaptor, linkage and setup.
How to check it
Start it from cold yourself, let it warm fully, then check hot starting and acceleration on the road.
K-Jetronic injection
K-Jetronic is mechanical continuous injection and it works very well when everything is healthy. A good car should start cleanly from cold, restart when hot, idle properly and pull without flat spots.
When K-Jet goes wrong, there’s no ECU to plug into and ask what’s wrong. Fuel pressure, injectors, intake leaks, the metering head and the warm-up and control-pressure side of the system all need checking properly.
I wouldn’t avoid a K-Jet car that runs properly and has useful history, but I wouldn’t buy one with persistent hot-start or fuelling problems on the assumption that it only needs a quick tune-up.
Engine durability, cambelt and water pump
The old Volkswagen 8-valve engines are tough. I’ve seen EX and DX engines with well over 150,000 miles that still ran brilliantly because they had been serviced properly. Mileage on its own wouldn’t put me off. I would be much more interested in how it starts, whether the cooling system behaves, whether it leaks badly and what the servicing looks like.
There’s loads of room in the engine bay compared with a modern car. I have rebuilt cylinder heads and changed main bearings on these engines using normal workshop guidance. That doesn’t make major engine work a beginner job, but they’re unusually approachable if you’re mechanically confident.
When I buy an 8-valve car I normally replace the cambelt and tensioner unless the evidence is exceptionally good. The parts normally cost me well under £100. My own preventative rule is roughly four years or 40,000 miles, whichever comes first; that’s my working rule rather than a quoted original Volkswagen interval.
The water pump on these 8-valve engines is driven separately, so it doesn’t automatically need replacing with the cambelt. I’m much happier doing an 8-valve belt myself. On a 16-valve engine I would be more cautious because the cam timing needs more care and the correct tools and procedure matter.
If there’s even the slightest sign of oil leaking from the rocker-cover gasket, I change it. It’s cheap, accessible and there’s no benefit in leaving a simple leak to get worse.
Gearboxes, 4+E and the automatic
The manual gearboxes are generally tough. My first 1.6 GT had the economy-geared 4+E five-speed. It works well on a run and helps the car make surprisingly good use of fuel, but performance is definitely modest.
My green GT II revival car was an automatic. It was easy enough to drive, but it took even more performance out of a car that wasn’t quick to begin with and the shift quality is nothing like a modern automatic. I would buy an automatic because I specifically wanted one, not because I thought it was the best version to drive.
Clutch and rod-shift linkage
A fairly heavy clutch isn’t unusual, but excessive stiffness, slipping, judder or obvious movement where the cable passes through the bulkhead needs investigating. Watch the cable mounting area while somebody operates the pedal. The metal can crack or weaken; reinforcement plates exist, but cracked metal still needs repairing properly.
The rod-shift linkage gets sloppy as its bushes wear. I’ve driven one where a bush had almost completely disappeared and the lever was vague and clunky. The bushes are cheap, so there’s no reason to live with a bad change. A healthy linkage should feel reasonably direct, find every gear easily and have no huge side-to-side slop.
Driveshafts and CV joints
On a slow full-lock turn, listen for a repetitive click from either front corner. That usually points towards an outer CV joint. Also inspect the boots for splits and lost grease.
I have changed complete shafts on these several times and they’re very straightforward compared with most modern cars. You still need proper lifting equipment, axle stands and the correct workshop procedure, but access is good and the layout is simple.
Bodywork, corrosion and the bodykit
These don’t generally rot anywhere near as badly as some other cars from the same period, which is one reason I like them as projects. That doesn’t mean they don’t rust. Check the jacking points, inner wheelarches, rear underside and corners, floor, sills, lower quarters, bonnet front lip and the strengthening sections underneath the bonnet.
The factory bodykit isn’t something I would start pulling off during a viewing. Some of the trim is bonded or fixed in a way that makes getting the original fit back again difficult. Instead, inspect everything you can see without dismantling the car: visible arch and sill edges, the inner arches, the underside and the places where the kit meets the painted body.
Bubbling, swelling, rust staining, cracked paint, distorted trim or suspicious fresh underseal are reasons to investigate further. A good original bodykit that has never been removed isn’t suspicious simply because nobody has taken it apart.
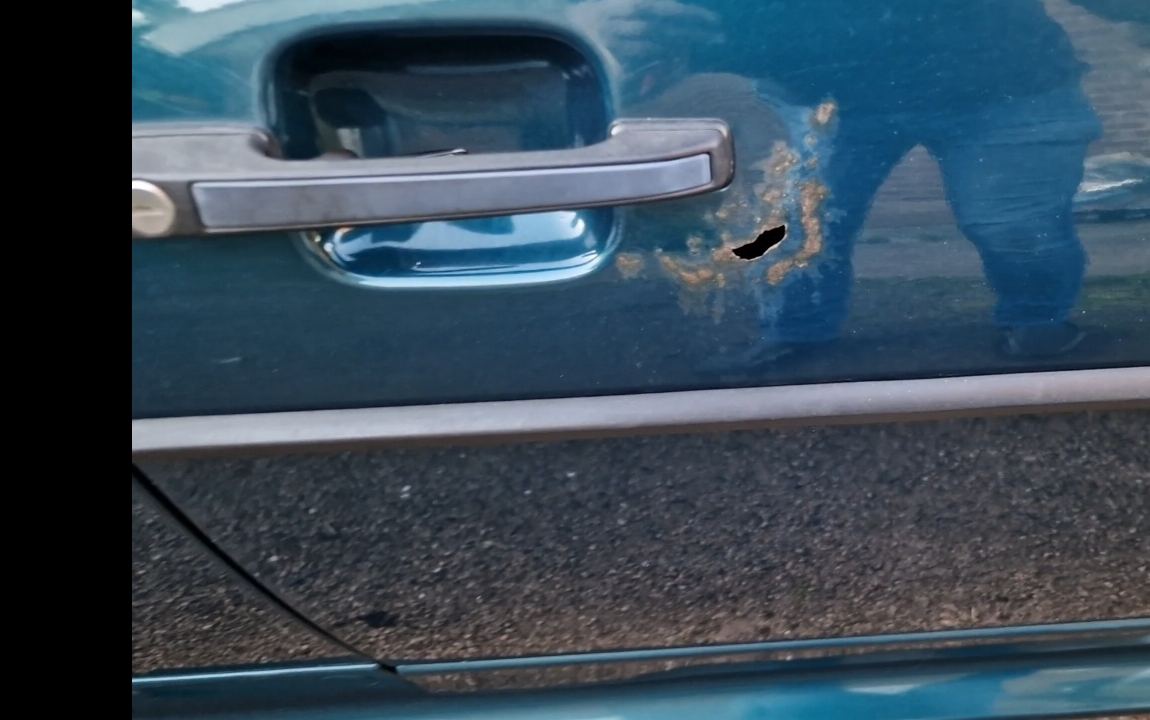
Door handle and lock surround
Where to look
Around both handles and locks, along the door bottoms and around the tailgate handle.
What good looks like
Solid metal, consistent paint and no swelling around the fittings.
Warning signs
Bubbles, cracking, rust staining or fresh local paint around a handle or lock.
What would concern me
Perforation or a poorly finished old repair. A small visible hole can require a much larger proper repair.
How to check it
Inspect closely in good light without dismantling anything or pressing hard enough to damage the paint.
Bonnet and metal fuel filler neck
A bonnet can look tidy on top while corrosion develops around the front fold and the strengthening sections underneath. Open it, inspect the lip and follow the seams rather than judging the painted outer skin alone.
The metal filler neck is also worth checking because it can rust through with age. If it becomes badly corroded, debris can reach the tank, filter and fuel system. Use a torch around the wheelarch side of the neck, brackets and joints. Heavy scaling, damp staining or perforation needs sorting properly.
Bodykit, wheels and originality
GT cars used the full black, non-colour-coded bodykit. GTX, Scala and GT II cars used colour-coded kit sections, while the rear spoiler remained black. Personally I much prefer the colour-coded cars. I think the kit makes the Mk2 look much more modern, although that’s simply my taste.
Many ordinary cars had steel wheels. Pirelli P-slot alloys are closely associated with some better-equipped and special-edition cars, and other Volkswagen alloy designs appeared during the model run. Wheels are easily changed, so use the brochure for the exact year if factory originality matters rather than treating one familiar design as universal.
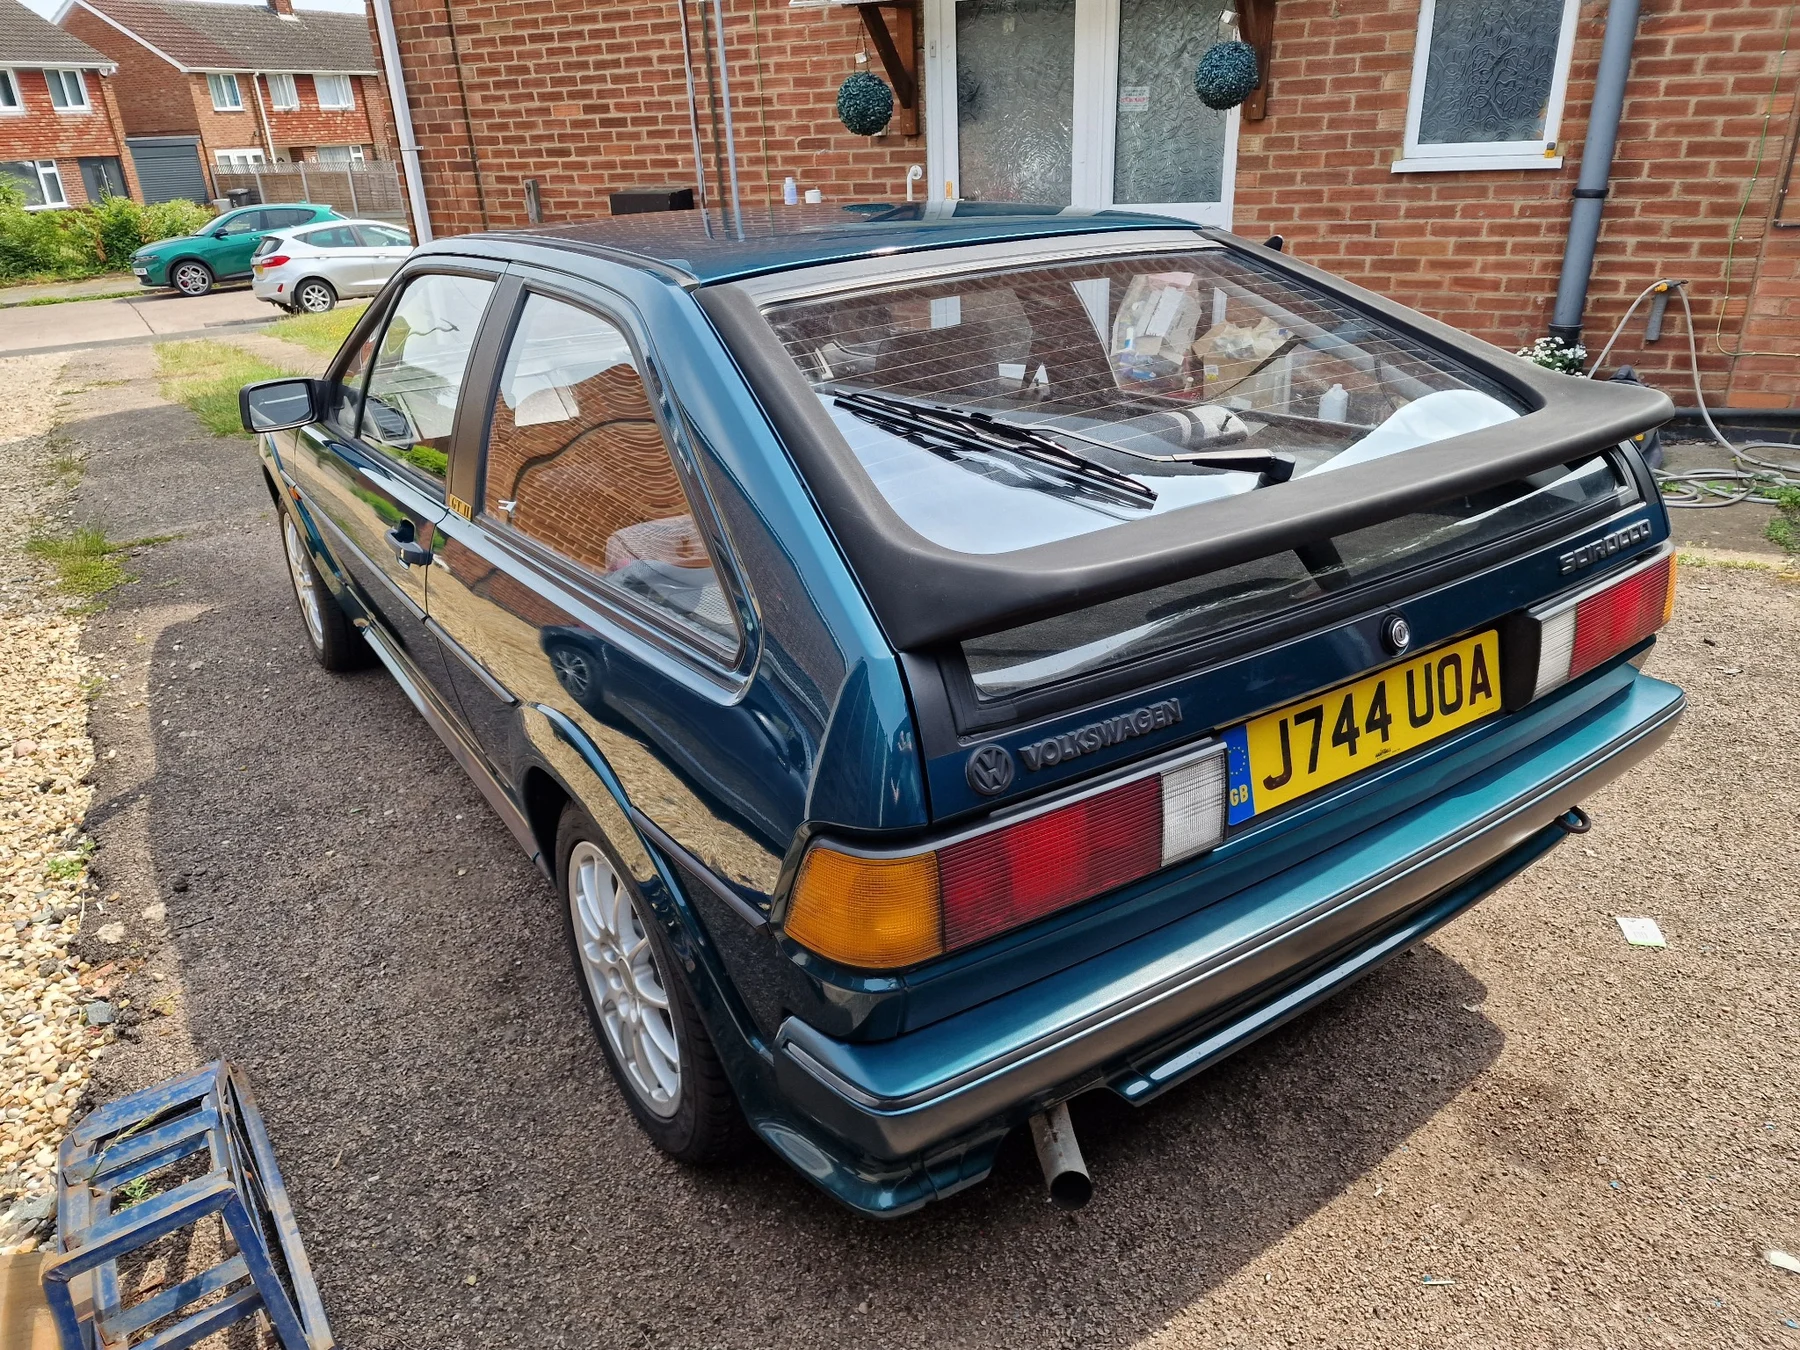
Previous bodywork and paint repairs
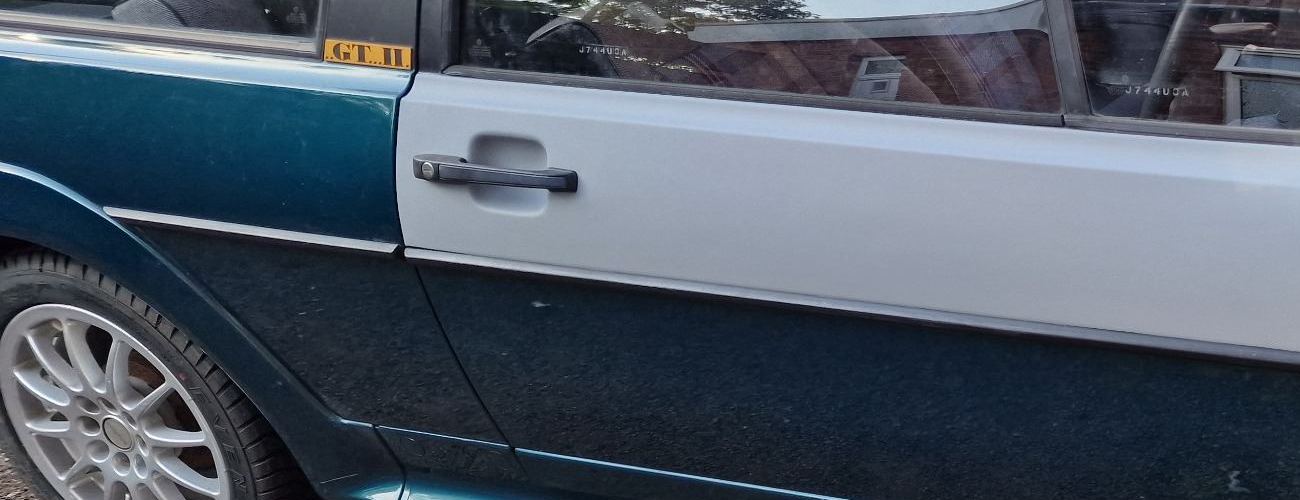
Previous paintwork isn’t automatically bad on a car of this age. Look for even panel gaps, sensible paint texture, clean masking edges and some explanation of why the work was done. Overspray, rippled panels, badly fitted trim and mismatched colour matter more than the simple fact that a panel has been painted.
Interior, dashboard and roofs
The interiors are surprisingly tough. The original seat cloth wears well, the door cards are strong, the carpets are thick and the manual window and mirror mechanisms rarely give much trouble. Check the seat bolsters and foams and look everywhere for damp, but a dry car that hasn’t been abused can wear its mileage very well.
Trim changed during the production run, so compare the exact year with a period brochure if originality matters. GTX cars are often associated with striped cloth, while relevant Scala and GT II versions used check or tartan-style patterns. The early Scalas I owned were very obviously colour coordinated: my red 1988 car had red seat trim and my white car had the lighter matching interior.
I also remember darker and lighter rear-lamp treatments on different Scala colours. Treat that as my experience of those cars and check the period brochure for the exact year and colour in front of you.
The dashboard is less forgiving. They crack after years of heat and sunlight, particularly across the top and around the vents. A genuinely uncracked original dash is worth looking after. The earlier four-button-horn steering wheel is another desirable original item that’s becoming difficult to find in good condition.
Once the front stop or retainer is released, the front seats slide out of their runners. That makes proper carpet cleaning and floor inspection ridiculously easy compared with most modern cars. During a viewing, use the normal adjustment unless the owner specifically agrees to anything more.
Personally, if I had two equally good cars in front of me, I would take the solid-roof one. Factory sunroofs and full-length fabric roofs can be fine when everything works, but seals, drains and mechanisms become more troublesome with age and replacement trim is harder to find. Check operation and water ingress properly.
Suspension and steering
Front lower arms, bushes, ball joints, wheel bearings, dampers and top mounts are conventional and normally affordable. I have replaced lower arms on these myself. Knocks, poor alignment and uneven tyre wear need investigating, but they aren’t exotic faults.
The steering is heavy at parking speed because UK cars are unassisted. That’s normal. Once moving, it lightens considerably. Excessive play, knocking, poor self-centring or a car that refuses to track straight are different and need investigating.
Brakes
Normal UK cars used front discs and rear drums. Factory rear discs belong to the 16-valve specification sold in other markets, so rear discs on a UK car normally mean a conversion or an imported car.
The standard brakes are probably one of the weaker parts of the car by modern standards. They should still stop it straight and consistently. Fresh fluid makes a noticeable difference, especially if the old fluid has been there for years; I change it every couple of years. I also want the rear drums adjusted properly, the wheel cylinders dry, the front discs and pads healthy and the flexi hoses in good condition.
If I wanted to improve the braking without going overboard, I would use a proven Golf-derived front setup and larger servo with the right calipers, carriers, discs, hoses and wheel clearance. I’ve used Golf parts successfully, but there are several combinations in circulation and brakes aren’t the place to guess. Buy a complete, documented setup from a specialist who can identify every part.
One GT II I bought had been off the road for more than five years and had a rear-disc conversion that wasn’t even connected properly. I made the brake lines, got the system working, replaced the failed fuel pump, rear exhaust box, front lower arms, front brakes, hoses and two tyres, and the car then passed its MOT with no advisories. That’s one reason I like these cars: even a neglected example can be straightforward to put right if the shell itself is sound.
Electrical checks and headlamps
Test the lights, heater fan, instruments, rear wiper and any electric windows or central locking the car actually has. Old alarm and stereo wiring causes more trouble than the basic loom on many cars.
The little plastic headlamp aim-adjuster clips go brittle and break. They’re cheap and simple to replace, so poor headlamp aim isn’t automatically a major problem, although the lamp still needs setting correctly afterwards.
What I normally do when I buy one
When I buy one of these, I normally give it a basic mechanical reset regardless of what the history says. The parts are cheap enough that I would rather know where I’m starting from.
I change the engine oil and filter, air and fuel filters, spark plugs, HT leads, distributor cap and rotor arm, thermostat, radiator fan switch, coolant, brake fluid, cambelt and tensioner. On a carb car I also deal with the mechanical fuel pump, vapour separator and carburettor condition. I check the ignition timing with a strobe, then inspect the front discs and pads, rear drums and shoes, handbrake, tyres and gear-linkage bushes.
If there’s even the slightest sign of oil leaking from the rocker-cover gasket, I change it. It’s cheap, accessible and there’s no benefit in leaving a simple leak to get worse.
I also like having the cambelt done before I sell one. Buyers often attach a much bigger perceived cost to a cambelt than the job actually carries on an 8-valve Scirocco. If I can do the belt and tensioner myself for well under £100 in parts, it makes no sense to leave it as an obvious objection. A dated invoice or parts record gives the buyer confidence.
- Oil, filters and ignition service items
- Cooling system, cambelt and tensioner
- Fuel pump and vapour separator on carburettor cars
- Brake fluid, front brakes, rear drums and handbrake
- Tyres, gear-linkage bushes and simple oil leaks
Standard performance and engine swaps
The injected DX is the quicker factory option, but in the real world I don’t think the difference between a healthy EX and DX is enormous. Even a manual 1.8 isn’t quick by modern standards. I would choose on condition, specification, simplicity and the overall car rather than factory power alone.
If I were building one purely as a road car, somewhere around 150 bhp would be about right for me. My first 1.6 GT was a car I loved, but I always felt another bit of power would have made it even nicer. That figure is my personal preference, not a limit or instruction.
I’ve owned modified Sciroccos as well as standard ones. One of the more extreme cars was a factory left-hand-drive 16V GTX on a C plate. It kept its KR engine but had been turbocharged using adapted Audi-related hardware. I don’t think a modified Scirocco is automatically a bad Scirocco; what matters is how the work has been done.
KR, ABF, 1.8T and VR6 conversions are all well established. Model- and engine-specific mounting hardware has made the physical installation easier, but the mounts are only one part of the job. Cooling, wiring, fuel supply, exhaust, gearbox, driveshafts and brakes still need doing properly.
Even before today’s off-the-shelf mount kits, people were building 2.0-litre versions using compatible Volkswagen bottom ends. I remember those conversions from the late 1990s, but the car in front of you matters more than a remembered engine-code recipe: check the engine number, invoices and the quality of the complete installation.
Tyres and parts availability
185/60 R14 is a common period size, although the exact fitment depends on the wheel and version. A standard Scirocco doesn’t need an expensive ultra-high-performance tyre for normal road use. I would rather have a decent fresh mid-range tyre than an old premium tyre with cracked sidewalls, and I would stay away from remoulds.
Check date codes, cracking, mismatched tyres, uneven wear and the correct load and speed ratings. Routine parts such as filters, ignition items, brakes, bushes, arms, bearings and belts are generally easy to find. Body panels, glass, bodykit pieces, rare steering wheels, original upholstery, model-specific trim and some K-Jetronic components are much harder.
What to check when viewing one
Work non-destructively. If the visible evidence raises a question you can’t answer, arrange a lift or specialist inspection rather than dismantling the seller’s car.
- Confirm the year, trim, engine code and whether it should have a carburettor or K-Jetronic.
- Inspect jacking points, inner arches, rear underside, rear corners, floor, bonnet and visible bodykit edges.
- Check the filler neck, cold start, warm-up, hot restart, cooling fan, fluid leaks and cambelt evidence.
- Watch the clutch-cable bulkhead, then check linkage feel, every gear, CV joints, front discs, rear drums and handbrake.
- Inspect the steering, dashboard, roof, seats, carpets, trim, wheels and other originality details.
- Match modifications to invoices, engine numbers, insurance details and the quality of the supporting work.
What to check on the test drive
Expect fairly heavy steering at parking speed, a reasonably weighty clutch and performance that feels modest by modern standards.
What you shouldn’t accept is excessive steering play, a clutch that’s abnormally stiff, a gear lever that feels disconnected, clicking CV joints, fuel starvation, unstable idle, overheating or brakes that pull or fade.
Drive it long enough to get fully warm. Use every gear, make slow full-lock turns in both directions, try a hot restart and give yourself enough room to assess the brakes properly.