
Practical advice · Real experience
How to Remove Light Scratches & Paint Transfer
The useful first question isn’t how to polish a mark out. It’s what the mark actually is. Some scuffs are material sitting on top of sound paint; others have gone through the clearcoat or removed paint altogether. The right answer changes with the evidence.
Clean the area first, then decide whether you’re looking at transferred material, a light clearcoat defect or missing paint. Start with the least aggressive safe method. If paint is missing, primer or bare material is visible, or you can’t judge the depth confidently, polishing is no longer the right fix.
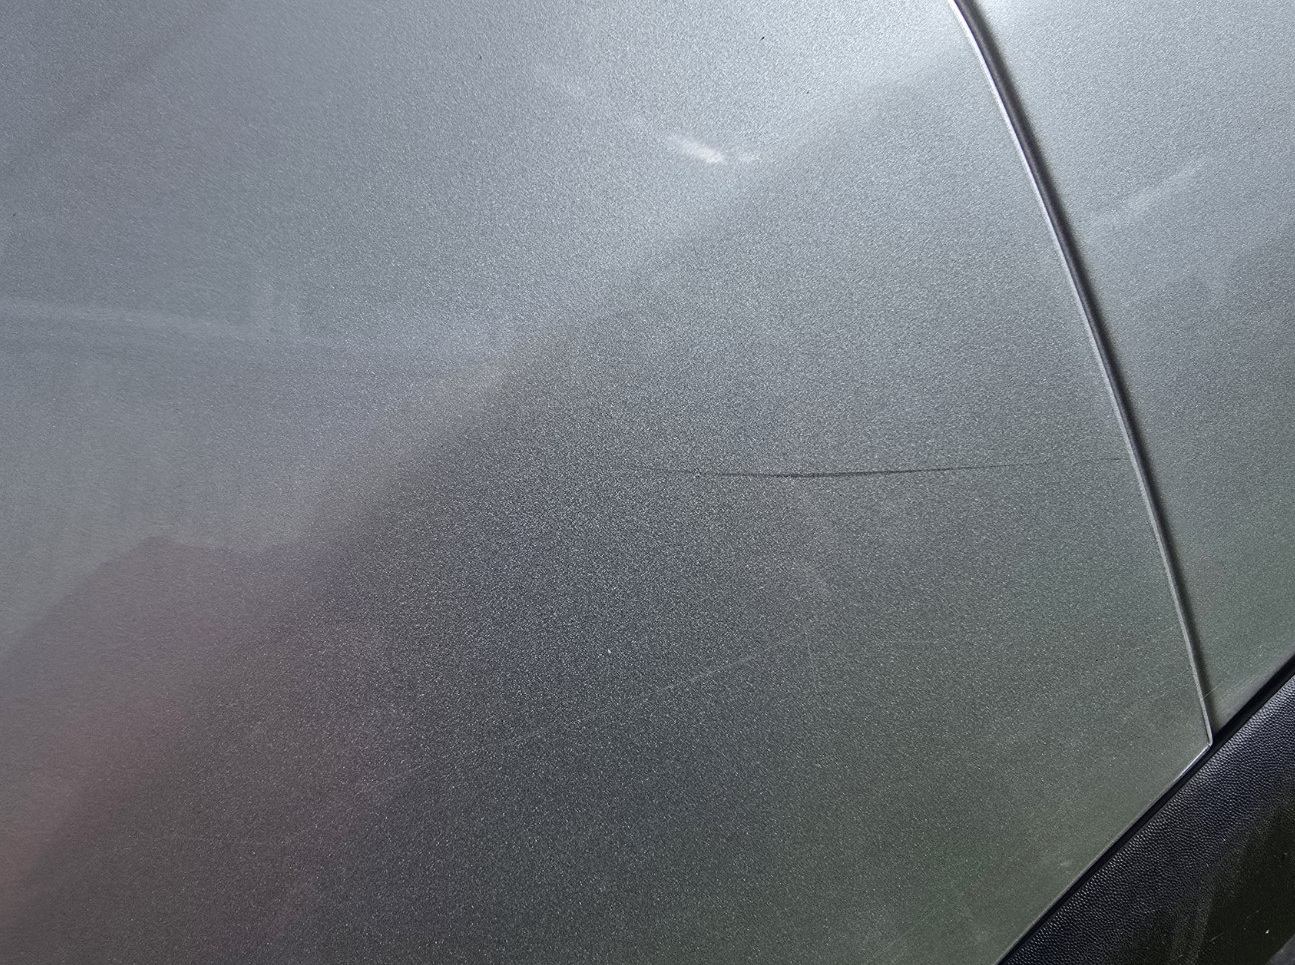
First identify what the mark actually is
Before you reach for polish, clean and dry the area so dirt isn’t disguising the defect. Then inspect it in daylight or a decent inspection light. You’re usually trying to separate transferred paint or rubber sitting on top of the clearcoat, very light clearcoat scratching and wash marks, a deeper clearcoat scratch, damage through the colour layer, chipped or missing paint, or failing lacquer.
A fingernail test can help, but it isn’t a laboratory instrument. If it catches deeply, the risk rises; if the mark looks raised or sits visibly on top of the surrounding finish, it may be transfer rather than a cut through the paint. Don’t rely on colour alone.
Paint transfer: material on top of the paint
Paint transfer, rubber marks and light contact scuffs can sometimes be removed without repainting because the visible material is sitting on top of otherwise sound clearcoat. Clean and decontaminate first, then start with the least aggressive safe approach.
A mild compound by hand, or a careful dual-action polishing pass where appropriate, may remove the transferred material and restore gloss. That doesn’t mean every mark will disappear, but it’s why a white or coloured line shouldn’t automatically be treated as a scratch through the paint.
Light scratches and clearcoat defects
Wash marks, light swirls, haze and shallow scuffs are often defects in the clearcoat rather than missing paint. Polishing can refine a microscopic amount of that surface and improve the way light reflects from it. It doesn’t fill a hole or recreate colour that has gone.
You’re trying to improve the paint without chasing perfection. For pad choice, heat and how to inspect the work, use the Machine Polishing for Beginners guide. Clean paint and a cautious test area matter more than an aggressive product.
Deeper scratches: where the boundary changes
A deeper scratch may still be within the clearcoat and can sometimes be improved substantially by selective very-fine wet sanding followed by machine polishing. That isn’t routine beginner work. Each pass removes material, and the margin for error changes with paint thickness, previous repairs, sharp edges, body lines and unknown paint history.
If the depth is uncertain, leave the mark alone or use a professional. A visible scratch is often preferable to a thin, overheated edge or a breakthrough that now needs paint.
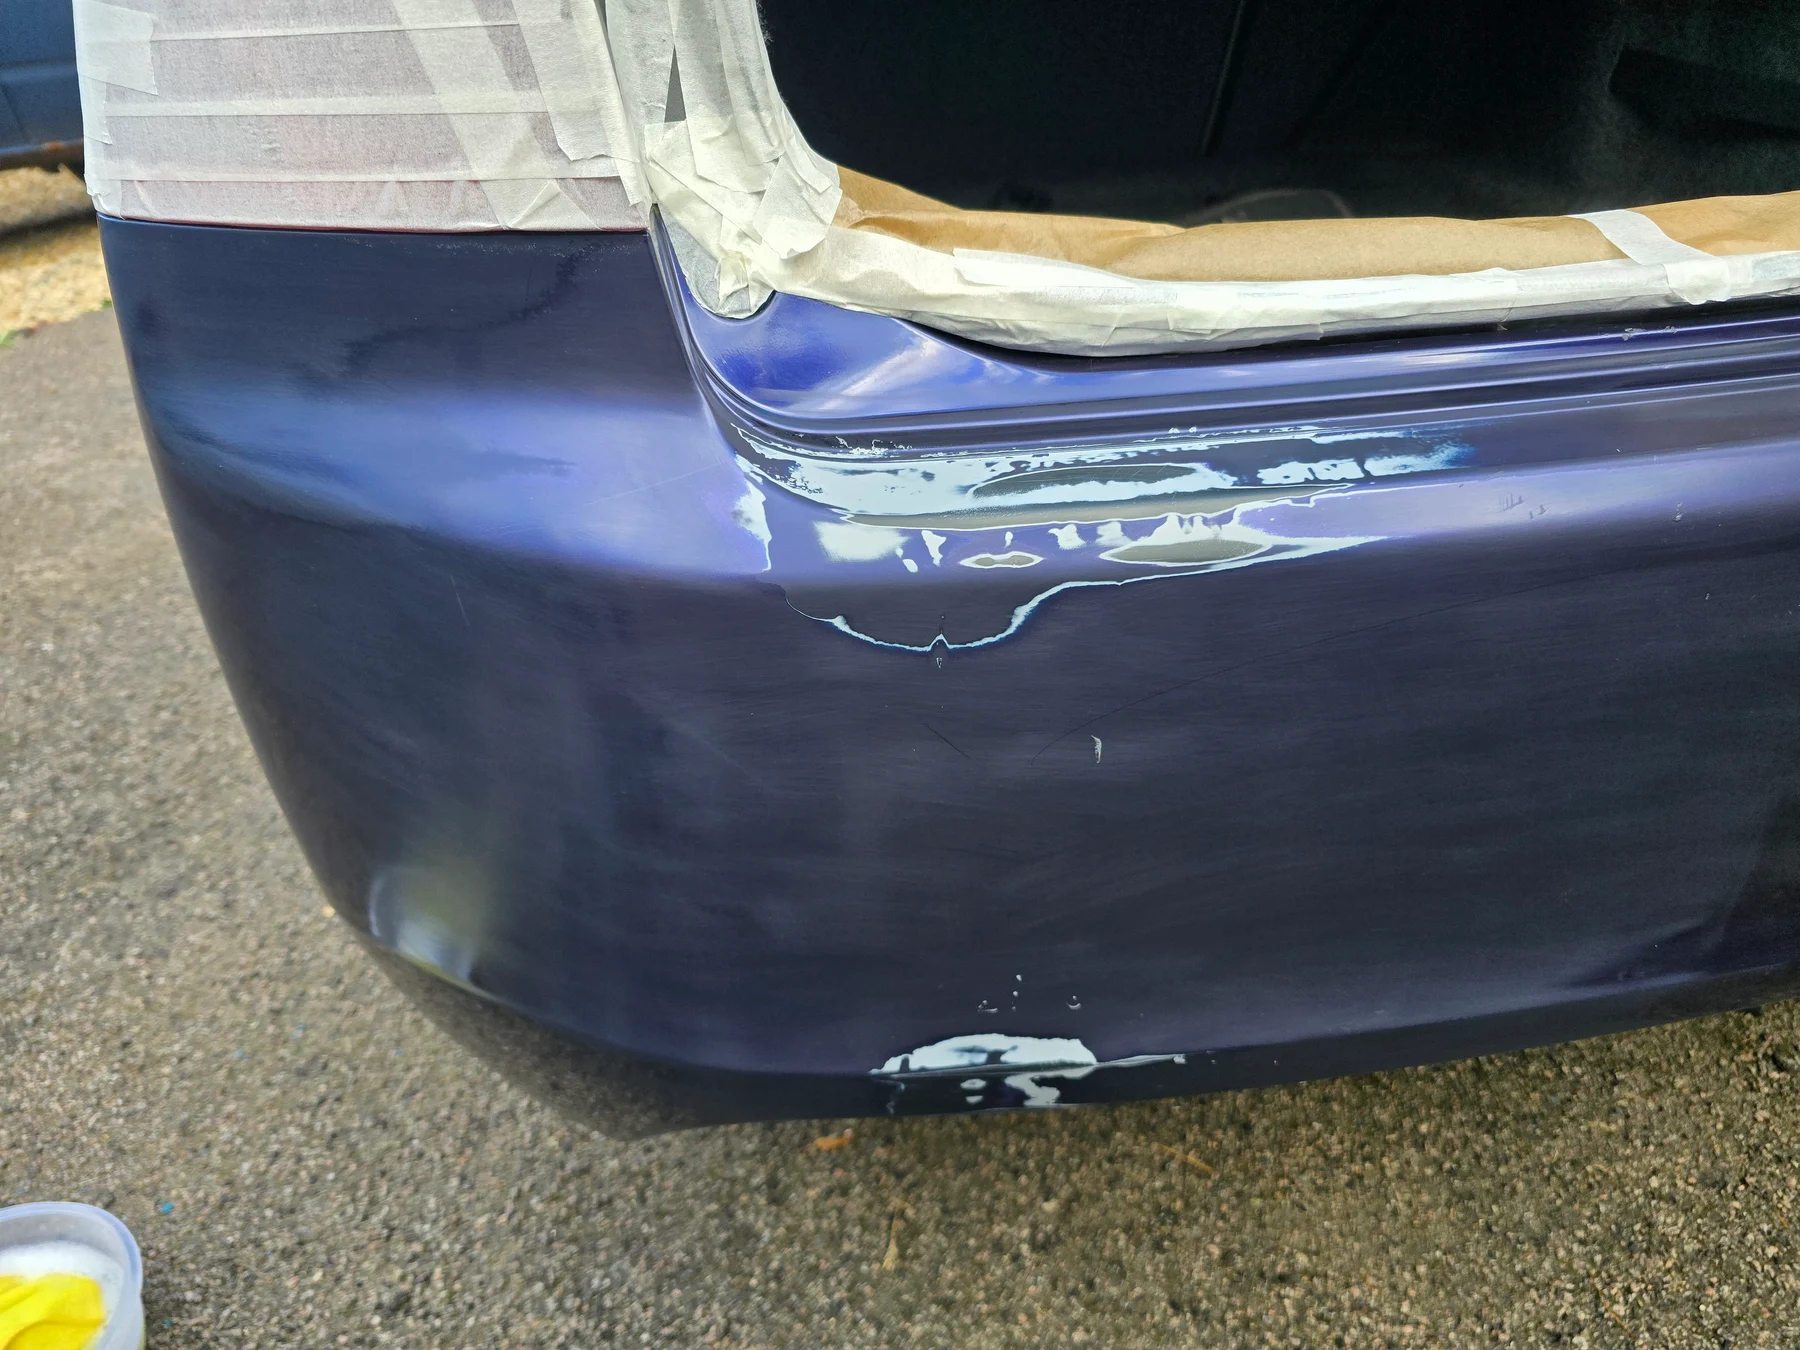
When polishing will not fix it
Polishing can’t restore primer, bare metal, exposed plastic, missing colour, severe gouges, failed lacquer, major body damage or a large area that needs filler and paint. These are repair decisions rather than scratch-removal decisions.
A tiny chip may suit a careful touch-up; a local bumper scuff may suit a SMART repair; extensive damage, corrosion or failing lacquer usually needs a bodyshop assessment. Be realistic about the car, the panel and the level of finish you need.
SMART repair: small local damage
SMART repair means a localised cosmetic repair. It can be a sensible option for a contained bumper scuff or small paint-damage area where access, colour and the required finish suit the method. Bumpers and localised vertical areas are generally more suitable than trying to repaint a bonnet, roof or a broad flat panel.
The 2003 Honda Accord is the useful real-world example here. Its rear bumper needed local paint repair before refinement; it wasn’t a polishing-only job. The Honda Accord Revival records the starting condition, repair stages and finished result.
What should I do?
Start with the evidence in front of you, not the product you already own. Clean and inspect first, then choose the smallest sensible intervention. That keeps the work honest and avoids converting a light cosmetic mark into a larger repair.
Safe limits and a sensible finish
Use clean media on cool paint, work a small test area and inspect the result before repeating anything. Don’t chase every isolated defect, especially around edges, creases, previous repairs or paint whose history you don’t know.
Safe washing and decontamination reduce the chance of adding wash damage in the first place. If the job is beyond your confidence or the consequence of a mistake is high, use appropriate professional help.