
Practical advice · Real experience
Machine Polishing a Car for Beginners
Machine polishing can make tired paint look dramatically better, but it isn’t a route to perfection. The safe objective is controlled improvement: refine the defects you reasonably can, inspect the result and preserve as much paint as possible.
Start with clean, cool paint and the least aggressive sensible pad-and-polish combination. Work a small test area with light, consistent pressure, inspect the finish and stop when the improvement is good enough. A DA polisher is more forgiving for beginners, but preserving paint matters more than chasing every scratch.
What polishing actually does
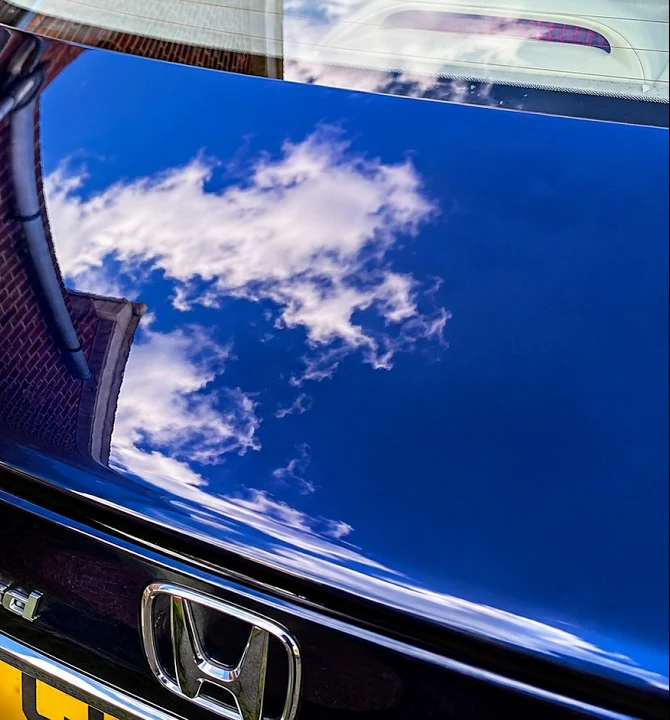
Swirls, wash marring, light oxidation, haze and superficial clearcoat defects scatter light, making paint look tired even when its basic colour is still sound. Polishing levels and refines a very small amount of the surface so reflections become clearer; it doesn’t magically fill or erase every defect.
That’s different from wax or protection, which helps preserve the result; paint repair, which replaces missing or damaged material; and wet sanding, which is a far more aggressive corrective technique. Machine polishing is useful for tired paint, mild oxidation, wash swirls, light scratches and improving presentation before sale. It can’t restore failed lacquer, missing paint, major body damage or badly cracked and peeling panels.
A real-world starting point
My interest in paint correction started around the age of 19 or 20, when I bought a white Peugeot 309 GTI for about £650. It had sat under a tree long enough that the paint had effectively gone green. I spent most of a day cutting it back by hand with T-Cut and plenty of effort.
That taught me how much dead, oxidised paint can improve, but it also showed why a modern machine can be easier and more controlled when it’s used sensibly. On most older cars I still prefer one good cutting or refinement pass, a careful inspection and then stopping once the improvement is good enough. A multi-stage concours finish is rarely the right job for an ordinary older car.
Choose the right tools and prepare the paint
A dual-action (DA) polisher is generally the more forgiving starting point for a beginner than an aggressive rotary, but it isn’t risk-free. Use a sensible pad and compound or polish, clean microfibres, a way to clean the pad, good inspection light and suitable wax, sealant or protection for afterwards. A panel wipe can help where appropriate.
Wash properly first, remove tar or iron contamination where it’s present, clay only if the paint genuinely needs it and dry the car completely. Polishing contaminated paint risks dragging bonded dirt across the surface. Inspect the paint before deciding what it can safely tolerate; don’t polish fresh uncured paint, obvious burn-through, failing clearcoat or unknown, extremely thin paint.
The practical beginner process
1. Work on a cool panel, out of strong sun. 2. Inspect the paint and choose a small test area. 3. Prime the pad—never put a completely dry pad onto paint. 4. Use a sensible amount of product and spread it at low speed if appropriate.
5. Work a manageable section with overlapping passes. 6. Use light, consistent pressure; don’t lean heavily on the machine. 7. Keep it moving and stop to inspect if heat builds. 8. Wipe the area clean under good light.
9. Repeat only if the result genuinely needs it. Start with the least aggressive combination that makes sense and increase cut only when the evidence says you need to. I normally prefer one effective pass rather than automatically stacking stages across the whole car.
Edges, heat and the defects you leave alone
Excessive pressure and lingering in one place create heat and risk. Sharp body lines, panel edges, creases, thin paint, repainted areas and unknown repairs all deserve extra care. Pad cleanliness matters too: a dirty or saturated pad changes how the machine behaves and can mark the finish.
Don’t repeatedly attack one scratch simply because it’s still visible. If a scratch is too deep to remove safely, leave it. One controlled stage can transform gloss, clarity and presentation on older paint even though stone chips, deep scratches and age-related defects remain.
Wet sanding is not routine beginner polishing
Wet sanding removes material much more aggressively than normal machine polishing. I only use very fine wet-and-dry selectively on deeper clearcoat defects where I judge it appropriate, then follow with machine polishing to refine the finish.
Paint thickness, previous repairs and edges dramatically change the risk. The Accord bumper footage is a real example of selected refinement work, not an instruction for an inexperienced owner to copy blindly.
Protect the result and keep expectations realistic
Once the paint is clean and inspected, use a suitable protective finish. I often use Poorboy’s Natty’s Blue wax or an equivalent protective product; it’s a finishing preference, not an advert. The important thing isn’t to undo the work immediately with poor washing or dirty media.
Expect more gloss, clearer reflections, reduced swirl and haze, stronger colour depth and better presentation. Don’t expect machine polishing to repair missing paint, failing clearcoat or every deep scratch. The sensible result is usually much better rather than perfect.
When to stop and when to ask a professional
A professional detailer or bodyshop may be the better choice for serious paint failure, fresh paint with an uncertain curing position, major repairs, severe damage, complicated colours or anything you can’t judge confidently. Conservatism isn’t a failure; preserving paint matters more than removing every mark.
Use the related guidance below to choose the right level of work, including where a controlled improvement is sensible and where a cosmetic defect should be left alone or assessed professionally.