
Practical advice · Real experience
SMART Repair & Minor Paint Repair
A small paint defect doesn’t always mean repainting a whole panel, but a local repair only makes sense when the damage, paint, car and expected result all line up.
Use a local repair for genuinely small, contained cosmetic damage where you can prepare it properly and the likely improvement justifies the time and cost. Don’t try to paint half a bonnet because of one small mark. If the job needs major shaping, difficult blending, structural work or a finish beyond your confidence, use a professional.
What SMART repair actually means
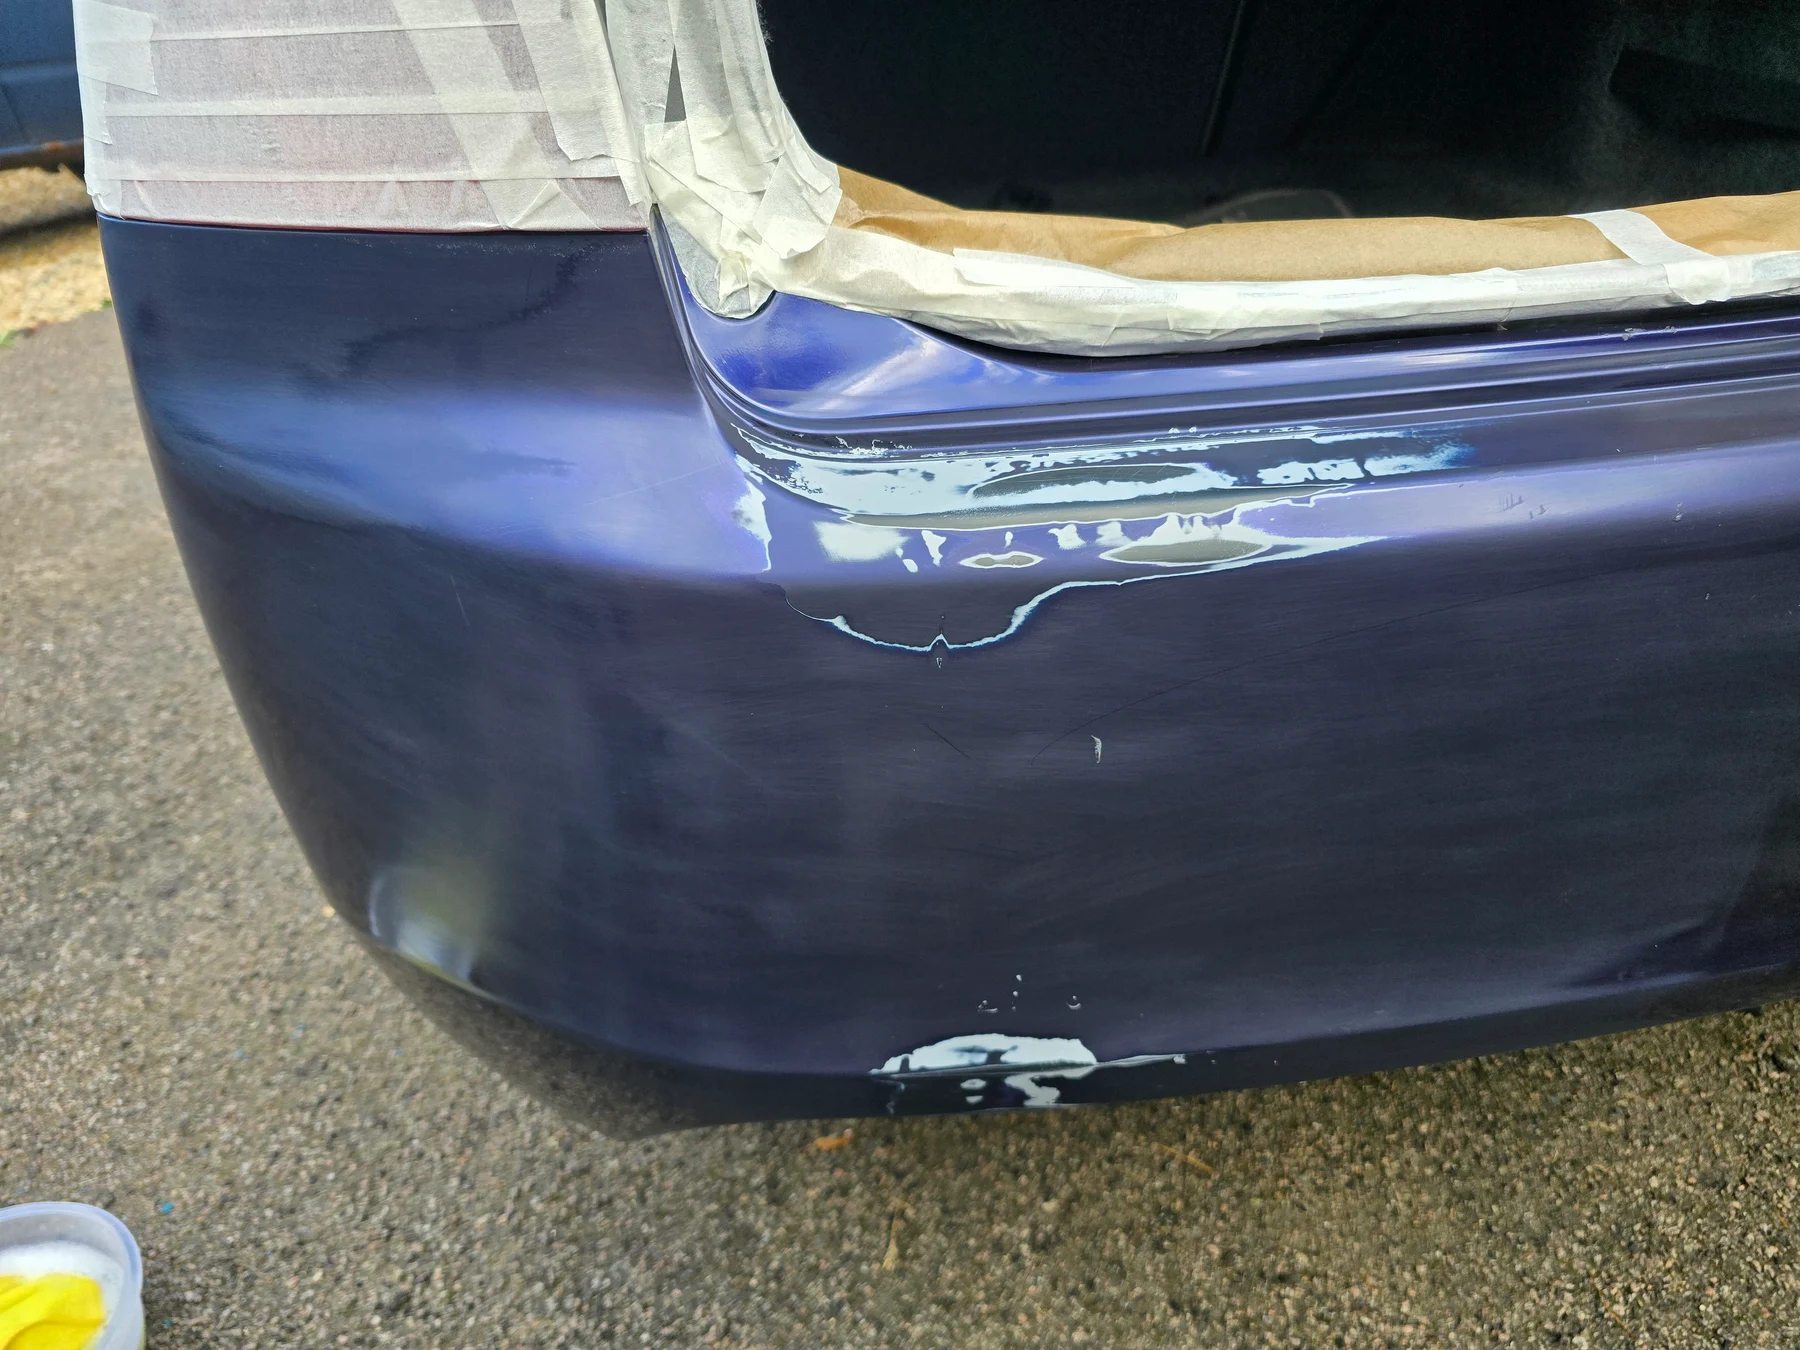
SMART repair usually means dealing with a small, local cosmetic defect without refinishing an entire large panel where that isn’t necessary. A bumper scuff, a small area of missing colour, a contained scratch or a localised poor previous repair can sometimes suit that approach.
It isn’t a magic label for every damaged panel. The defect still has to be small enough, accessible enough and suitable enough for the paint, panel and expected finish. A poor local repair can draw more attention than the original mark.
When a local repair makes sense
Bumpers, smaller vertical-panel defects and contained cosmetic areas are often the most forgiving places to improve. They can make sense on an older everyday car where a visible improvement matters more than bodyshop perfection.
Large flat horizontal panels are different. Don’t try to paint half a bonnet or roof because of one small defect. Big areas, major dents, extensive filler, difficult blends and complicated multi-stage colours can quickly become a job that looks worse than the original damage.
When not to DIY
Stop before you start if structural damage is suspected, corrosion is extensive, the panel needs major reshaping, airbags or sensors are involved, or the repair spreads across a large area. Those aren’t sensible places to learn by trial and error.
I would also use a dent-repair specialist for a dent rather than filling every low spot with body filler.
For the wider safety and equipment boundaries, read When NOT to DIY.
Preparation is where the result is decided
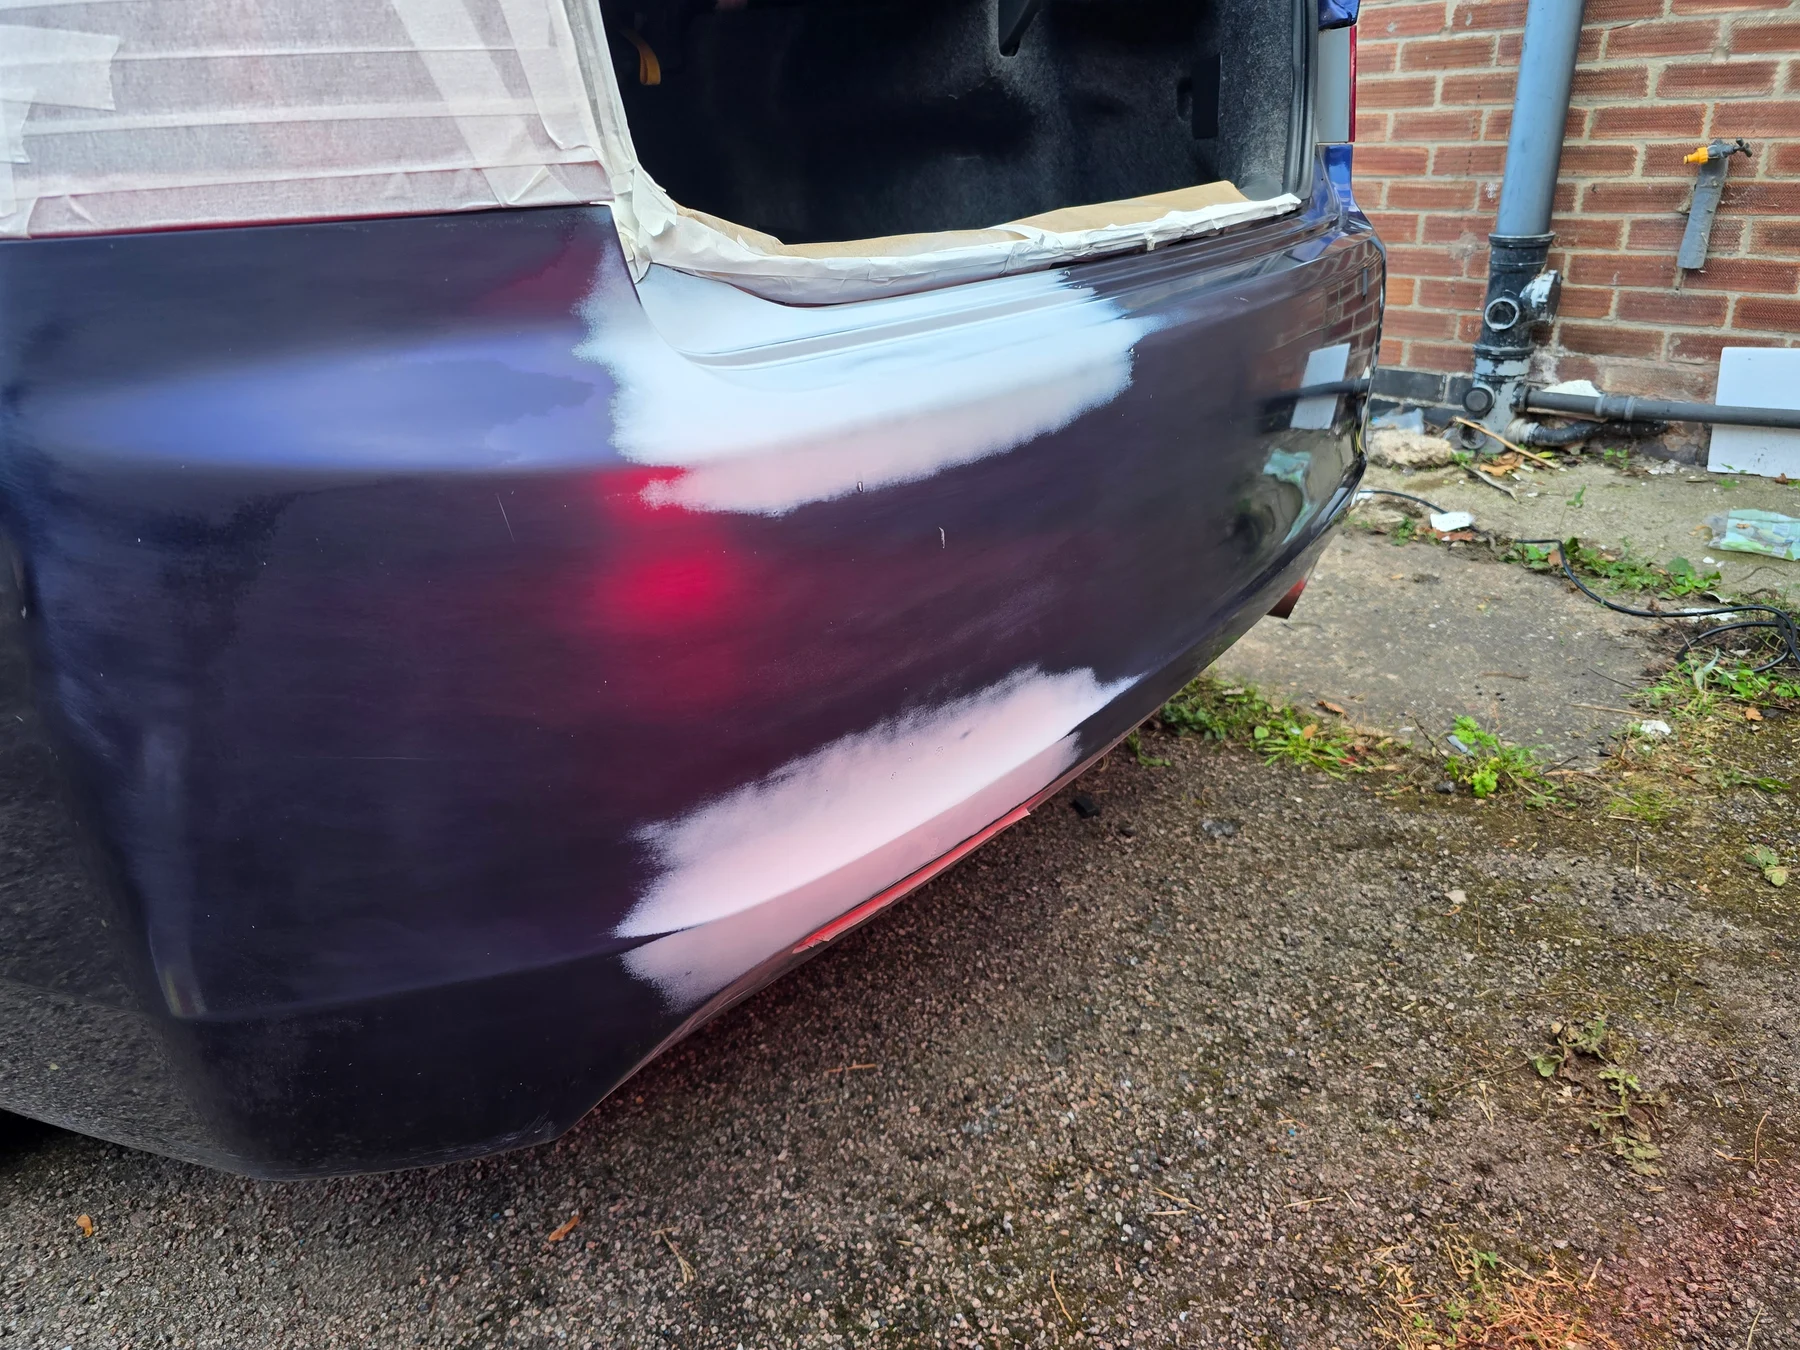
Wash and degrease the area properly, then inspect what’s really damaged. Remove loose or flaking material where appropriate, key the repair carefully and feather the edges rather than creating a hard ridge.
Mask with care and protect the surrounding panel. Panel wipe helps remove residues before paint; it can’t rescue a rushed sanding job or contamination trapped underneath.
Primer, colour and lacquer
Primer is useful where bare material is exposed, corrosion treatment has removed existing paint or the repair needs a stable base. Follow the product instructions for the system and temperature rather than copying a fixed number of coats from somebody else’s job.
Build colour with light, controlled coats and allow the stated flash time. Trying to cover everything in one heavy wet coat is how runs, texture and poor control start. Clearcoat brings gloss and protection, but it also needs the right conditions and time between stages. Wear suitable respiratory protection and don’t spray in an unsuitable enclosed or unventilated space.
Curing, heat and final refinement
Controlled warmth can help some products cure when the product and process allow it. On the Accord I used controlled IR/UV-assisted curing and checked panel temperature with an IR thermometer. More heat isn’t automatically faster or better, and the panel needs to cool before refinement.
Once the repair has cured properly, minor texture, dust nibs or blend imperfections can sometimes be refined. Polishing can’t recreate missing paint or fix an unstable repair.
For the machine and paint-correction limits, read Machine Polishing a Car for Beginners.
The Accord: a real local bumper repair
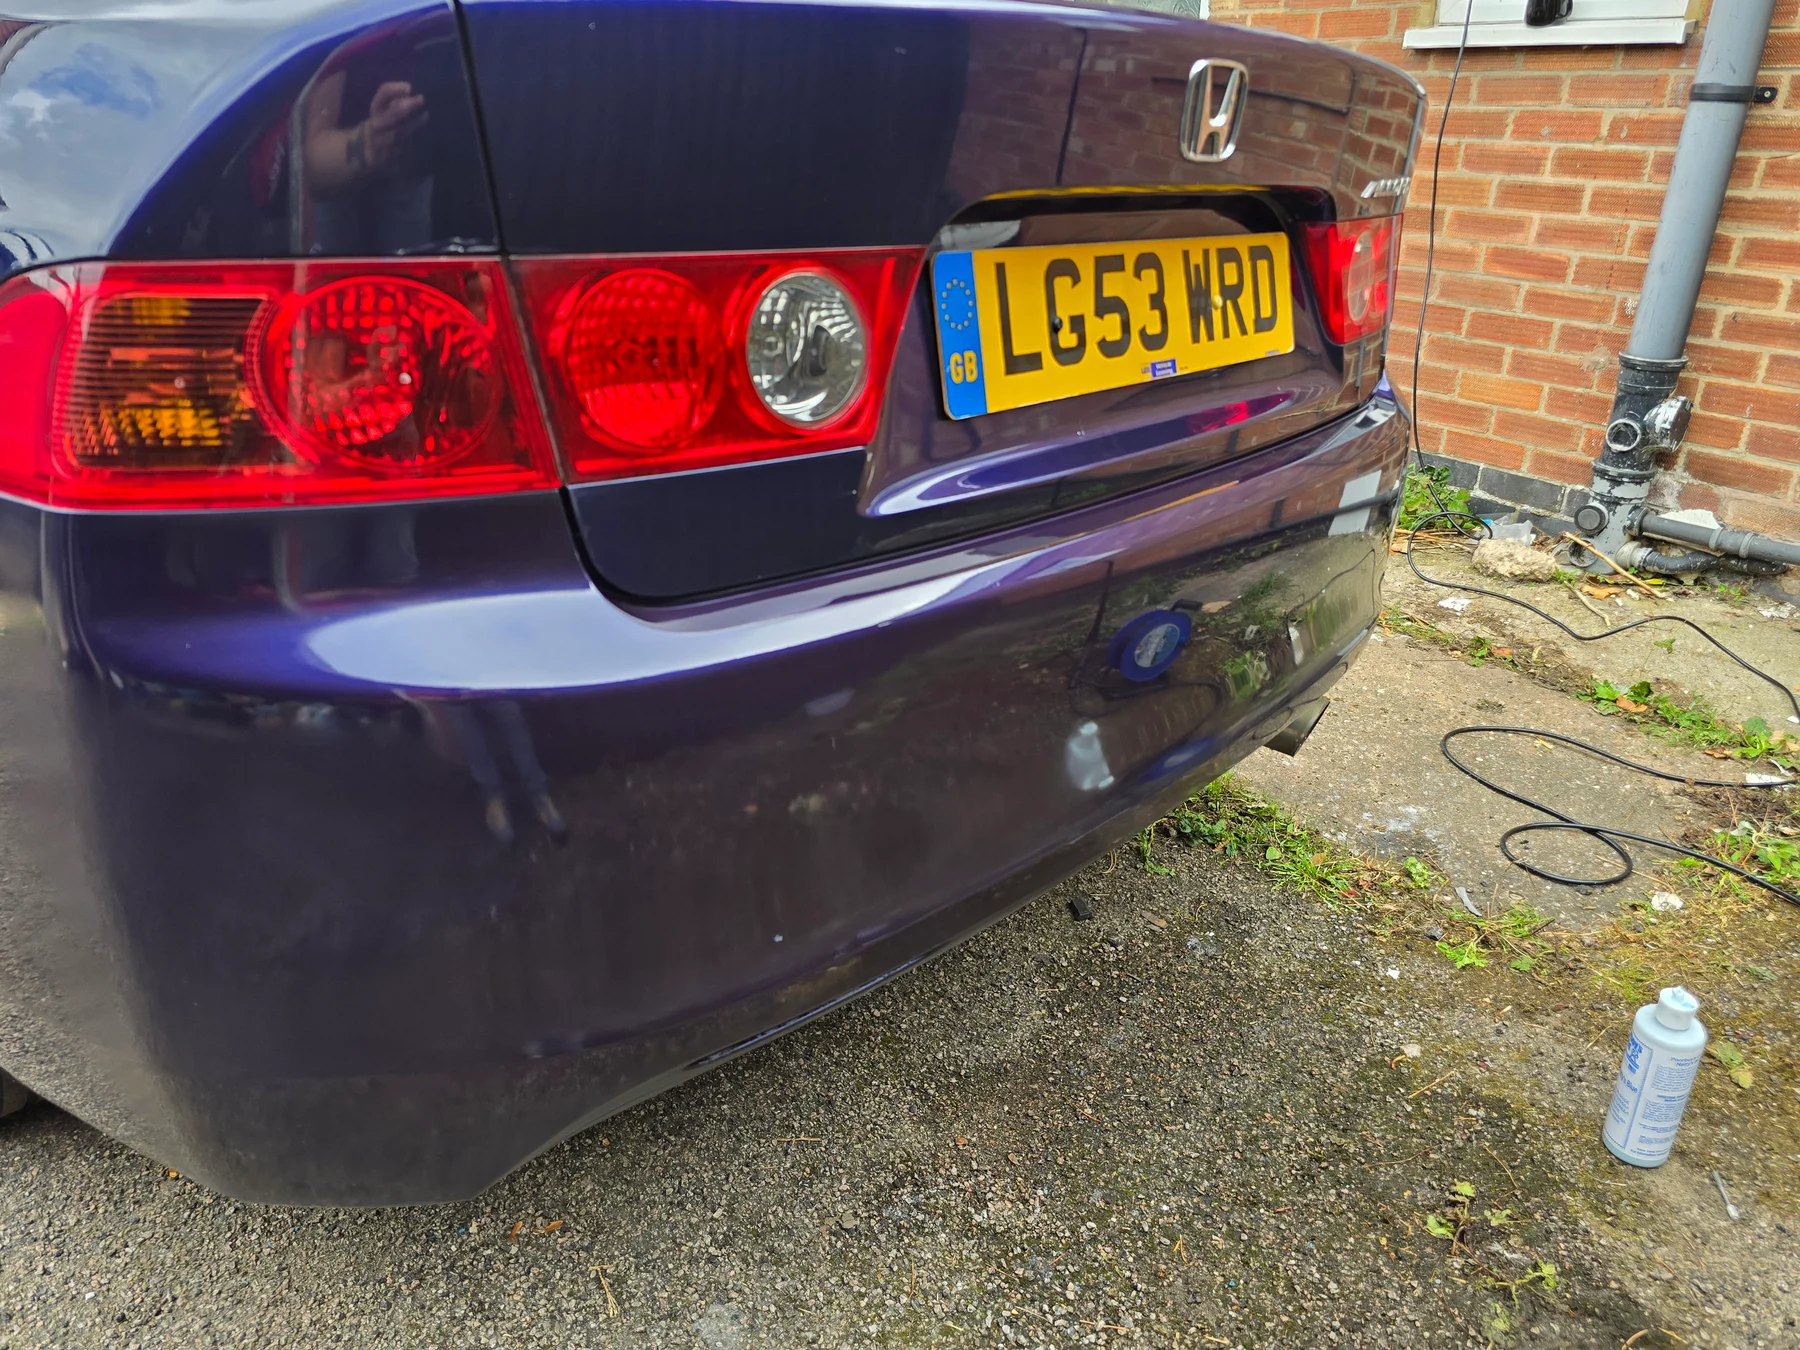
The 2003 Honda Accord rear bumper had previous cosmetic deterioration that was too severe for polishing alone. The work involved local preparation, primer, base colour, clearcoat, controlled curing, selective wet sanding where appropriate and DA polishing.
The finished repair impressed the eventual buyer, but the honest claim is simpler: it removed a major visual distraction as part of a wider preparation job.
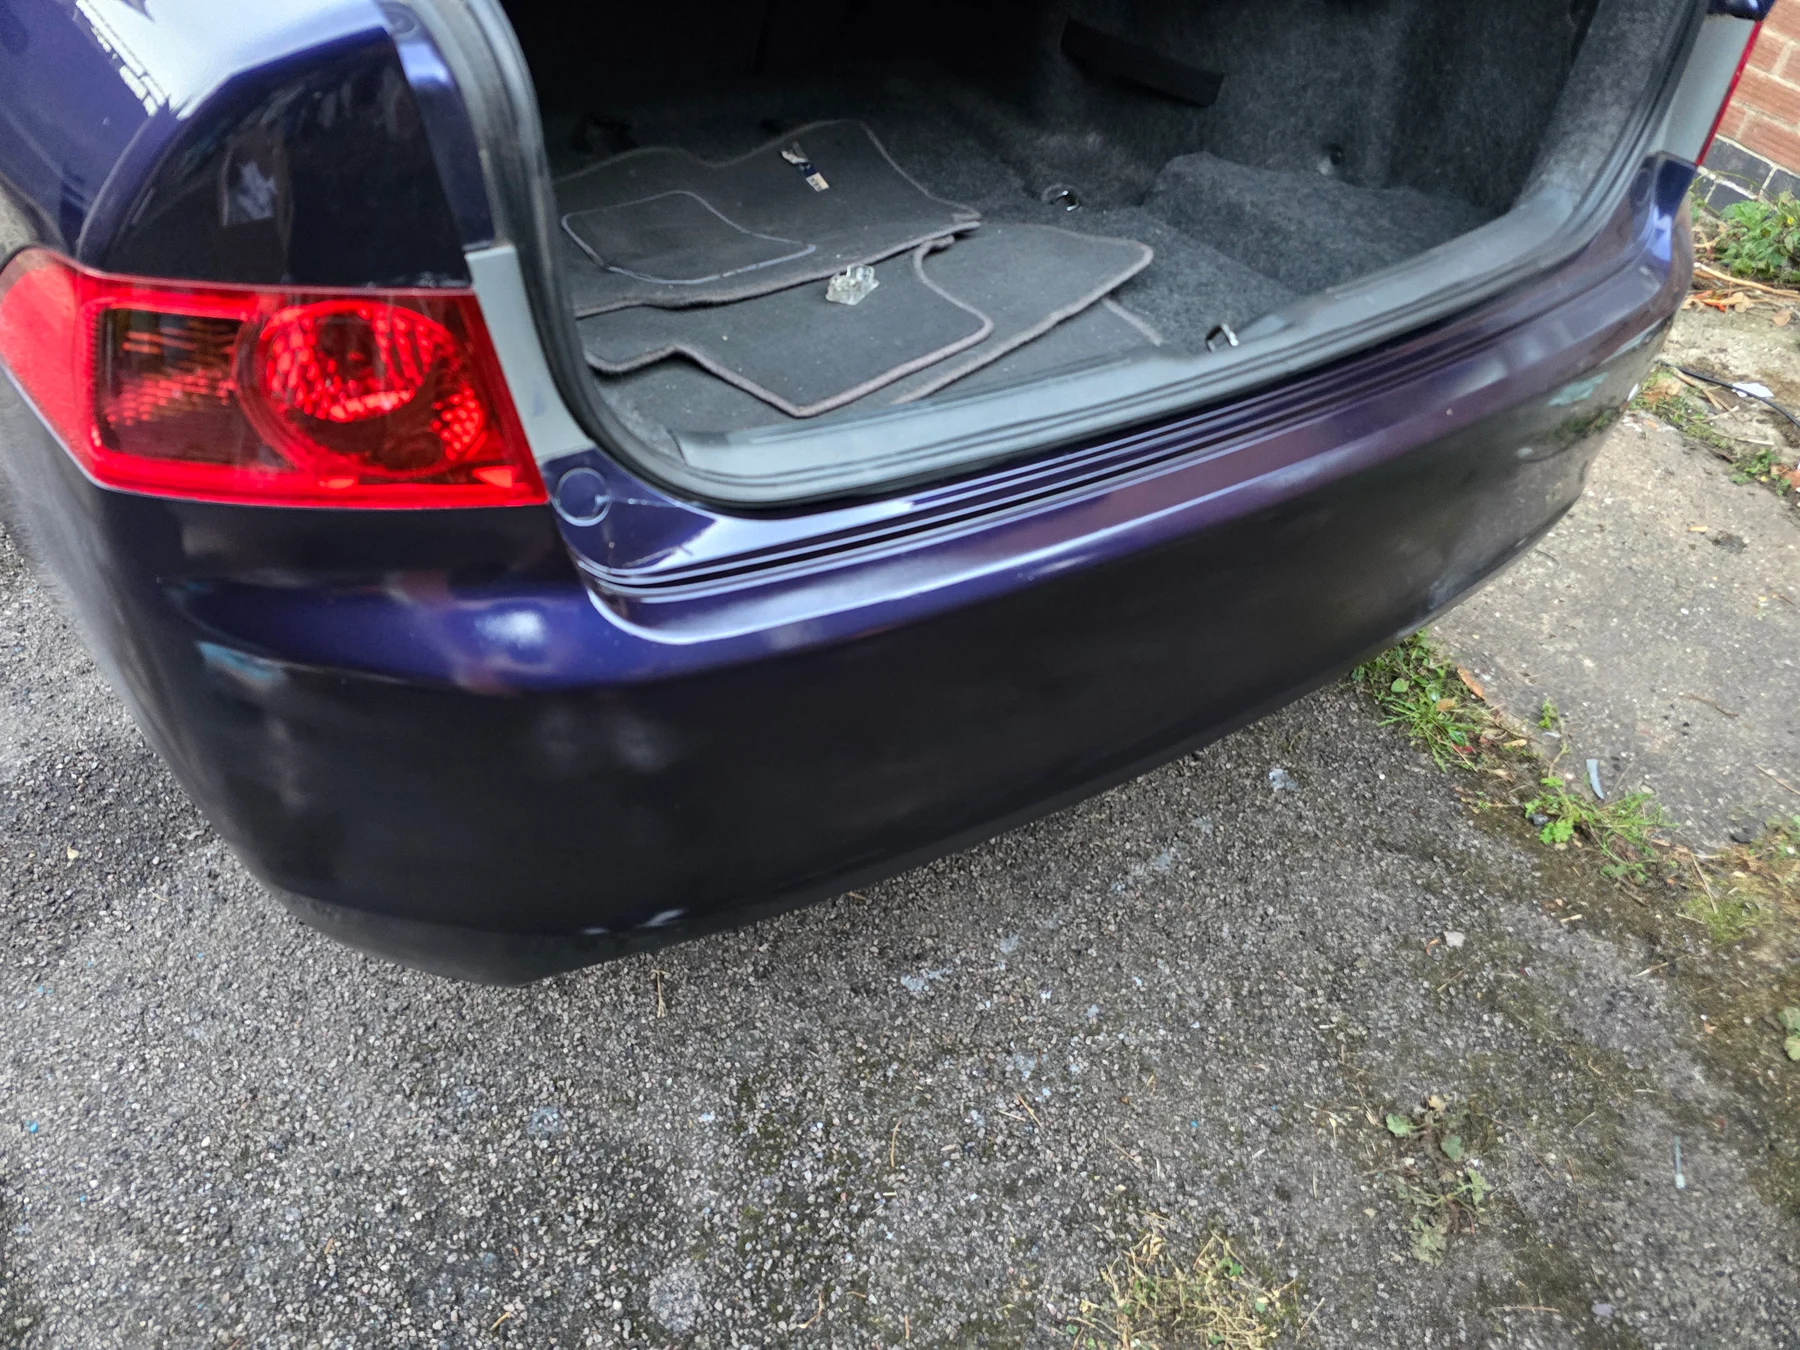
See the full before, process and finished evidence in the Honda Accord Revival.
Corrosion and difficult paint are different jobs
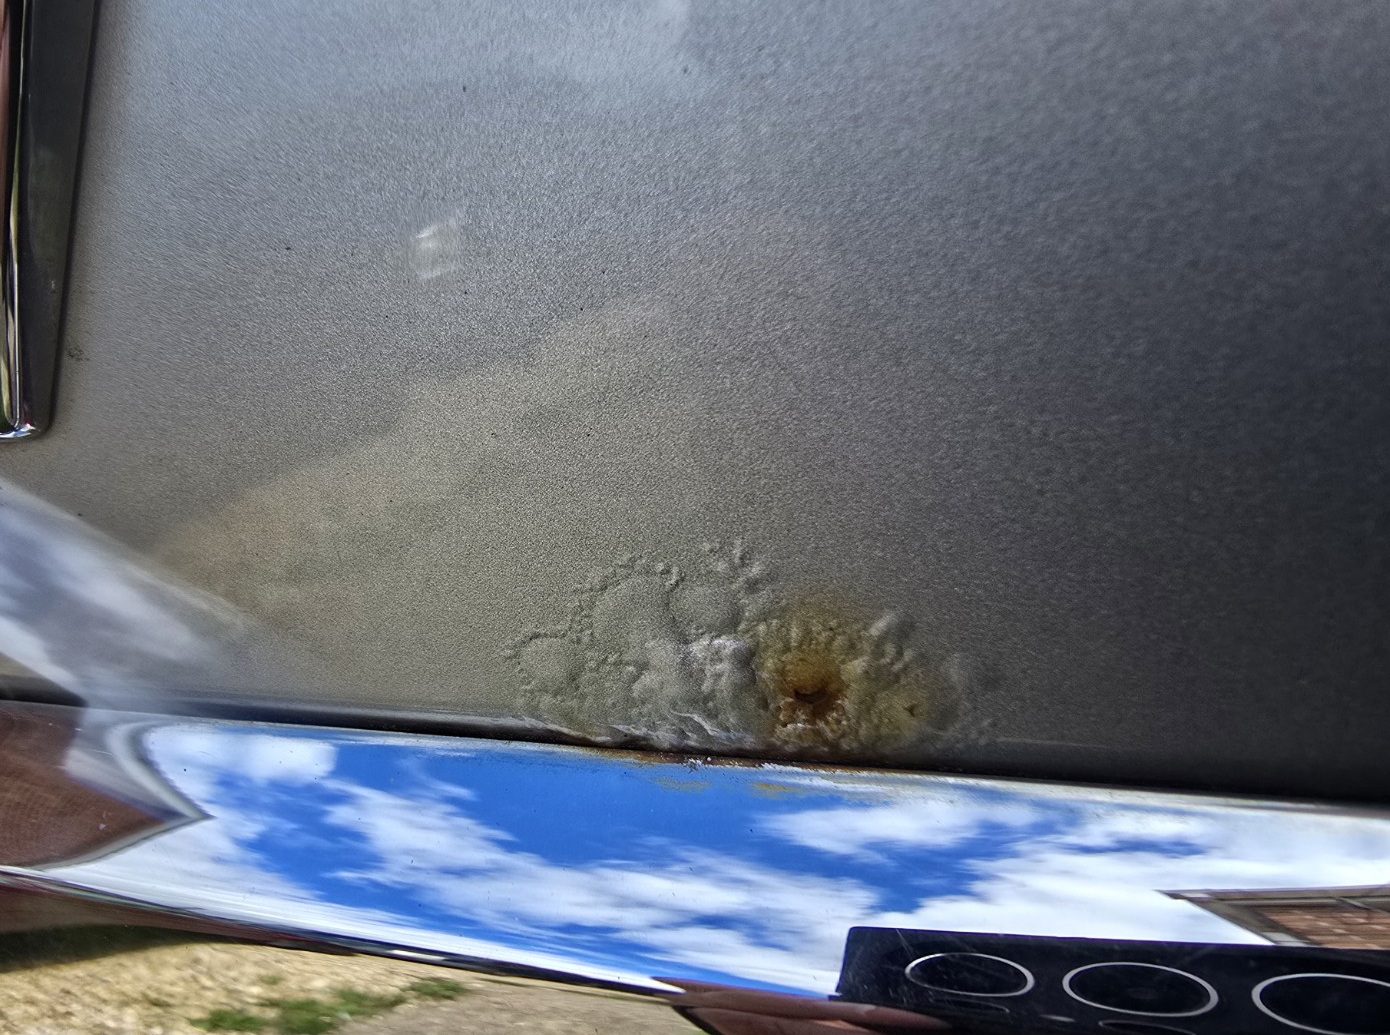
The Renault Captur tailgate evidence is a useful reminder that local paint deterioration and corrosion need a proper look before anyone reaches for a touch-up. Where corrosion is spreading, the material beneath the paint may need more than a cosmetic cover-up.
Previous repairs, faded paint, metallic finishes and multi-stage colours also make matching harder. A worthwhile repair can make a defect far less noticeable and protect exposed material, but it doesn’t need to be invisible under bodyshop lighting to be useful on an older car.
Make the repair earn its place
Professional SMART repair can be good value when the car is valuable, the blend needs to be commercially strong, time matters or the job is just beyond your equipment and experience. That isn’t failure; it’s choosing the right route for the car.
For a modest older car, leaving a proportionate mark alone can be the sensible call. Start with the least aggressive method and avoid creating further damage while you decide.
The wider Real-World Transformations hub keeps the same evidence-led standard.
Common mistakes to avoid
The mistakes are usually predictable: painting over contamination, using the wrong code, applying too much product too quickly, rushing flash time, masking poorly, spraying in unsuitable conditions, sanding too aggressively or polishing before paint has cured.
Keep the repair local, work within the product guidance and stop while the result is still improving. Chasing a perfect finish after the repair is already good enough is where a small job often becomes a larger one.
Choose the right next step
Polish it when the defect is mainly in the clearcoat. Use a local repair where paint is missing but the damage is genuinely small and contained. Choose professional SMART repair when blending or finish quality is beyond your confidence.
Use a bodyshop for large, structural, heavily corroded or major-repair work. Leave it alone when the car’s age and value make the defect proportionate and the repair cost makes no sense. The best decision is the one that improves the car without pretending every mark needs to disappear.