
Practical DIY repair · Genuine result
Mercedes W204 Roof Trim Lacquer Peel Repair | DIY Guide
A common W204 cosmetic problem, repaired properly by removing, preparing, refinishing and refitting the original roof trims.
Introduction
Lacquer failure on the black roof-gutter trims is a common age-related problem on the Mercedes-Benz C-Class W204. It can make an otherwise tidy car look older and neglected even when the trim underneath is still sound.
This guide follows the refurbishment I carried out on a real 2010 Mercedes C-Class. The video shows the failed finish, removal, preparation, refinishing, refitting and the finished result.
Before and after
The original coating had broken down and was peeling across the roof-gutter trim. Removing the failed finish and refinishing the original part restored the deep black gloss.
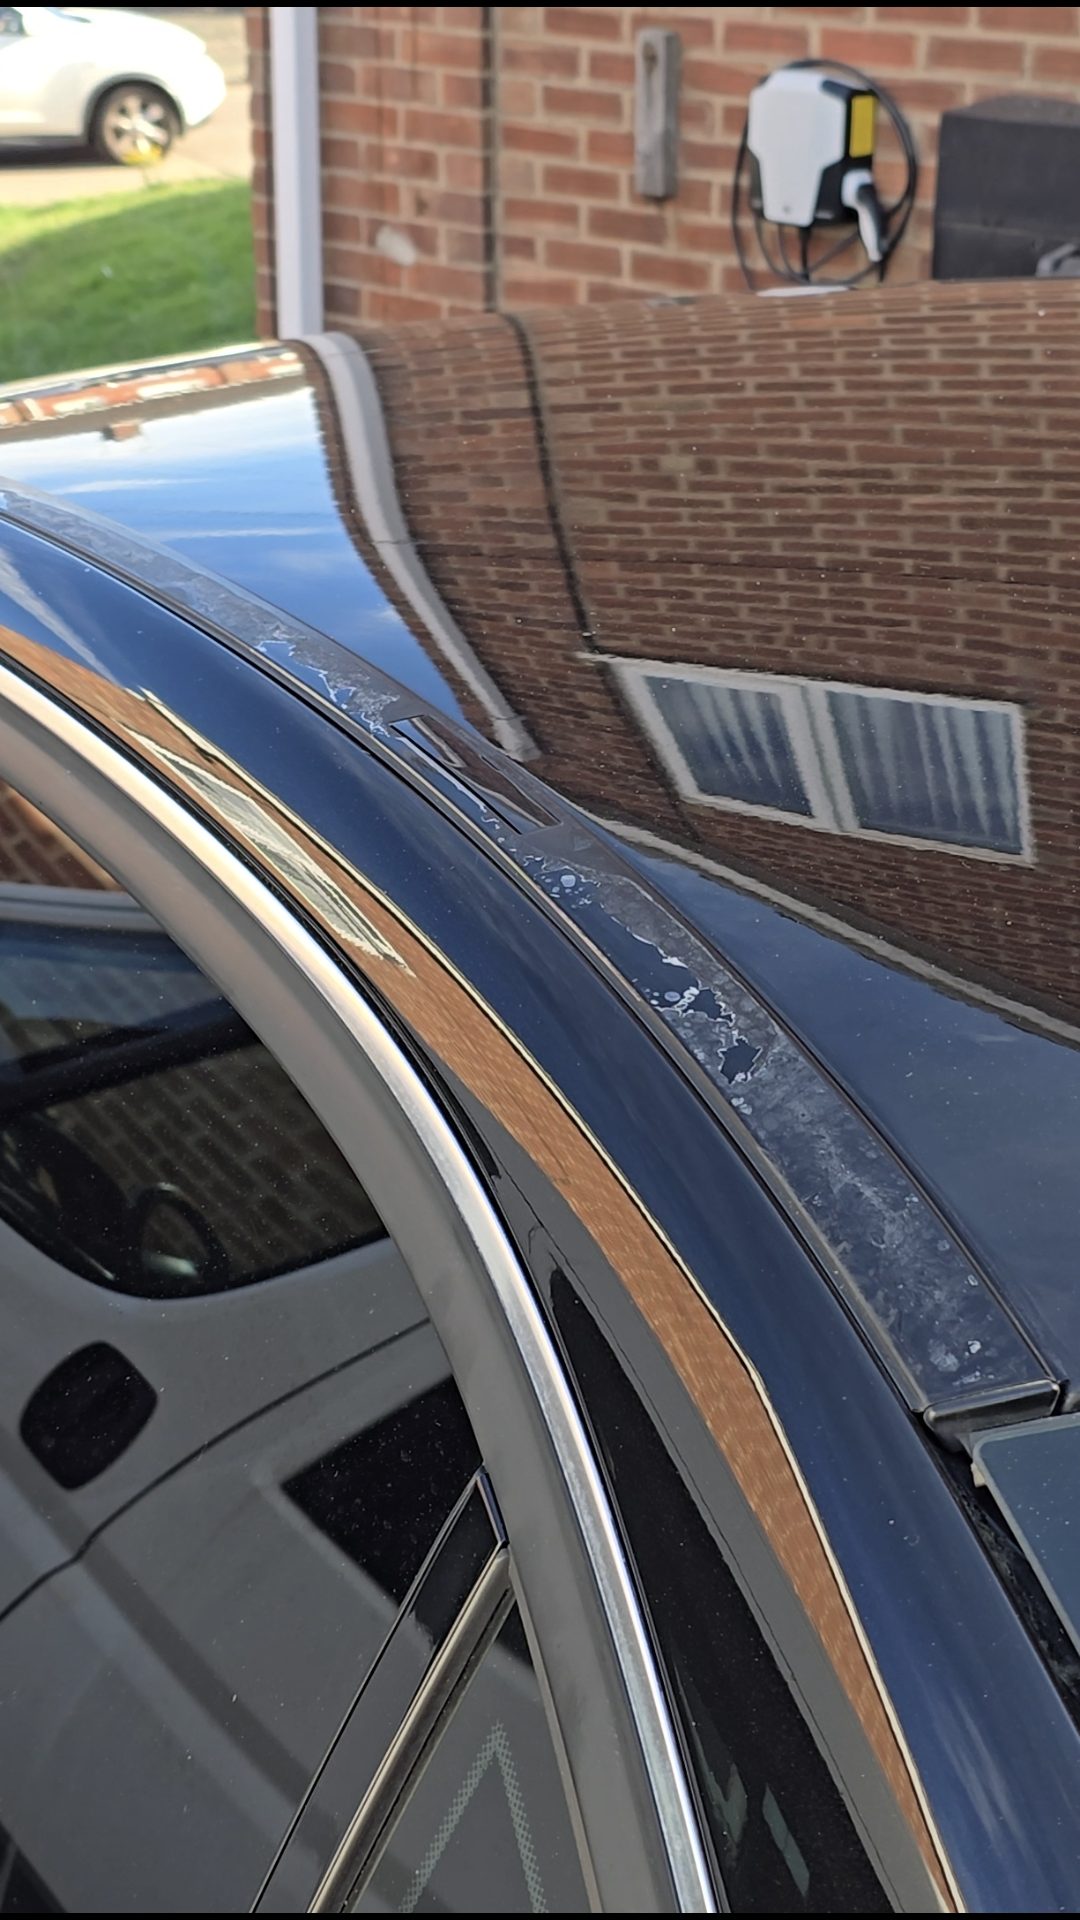
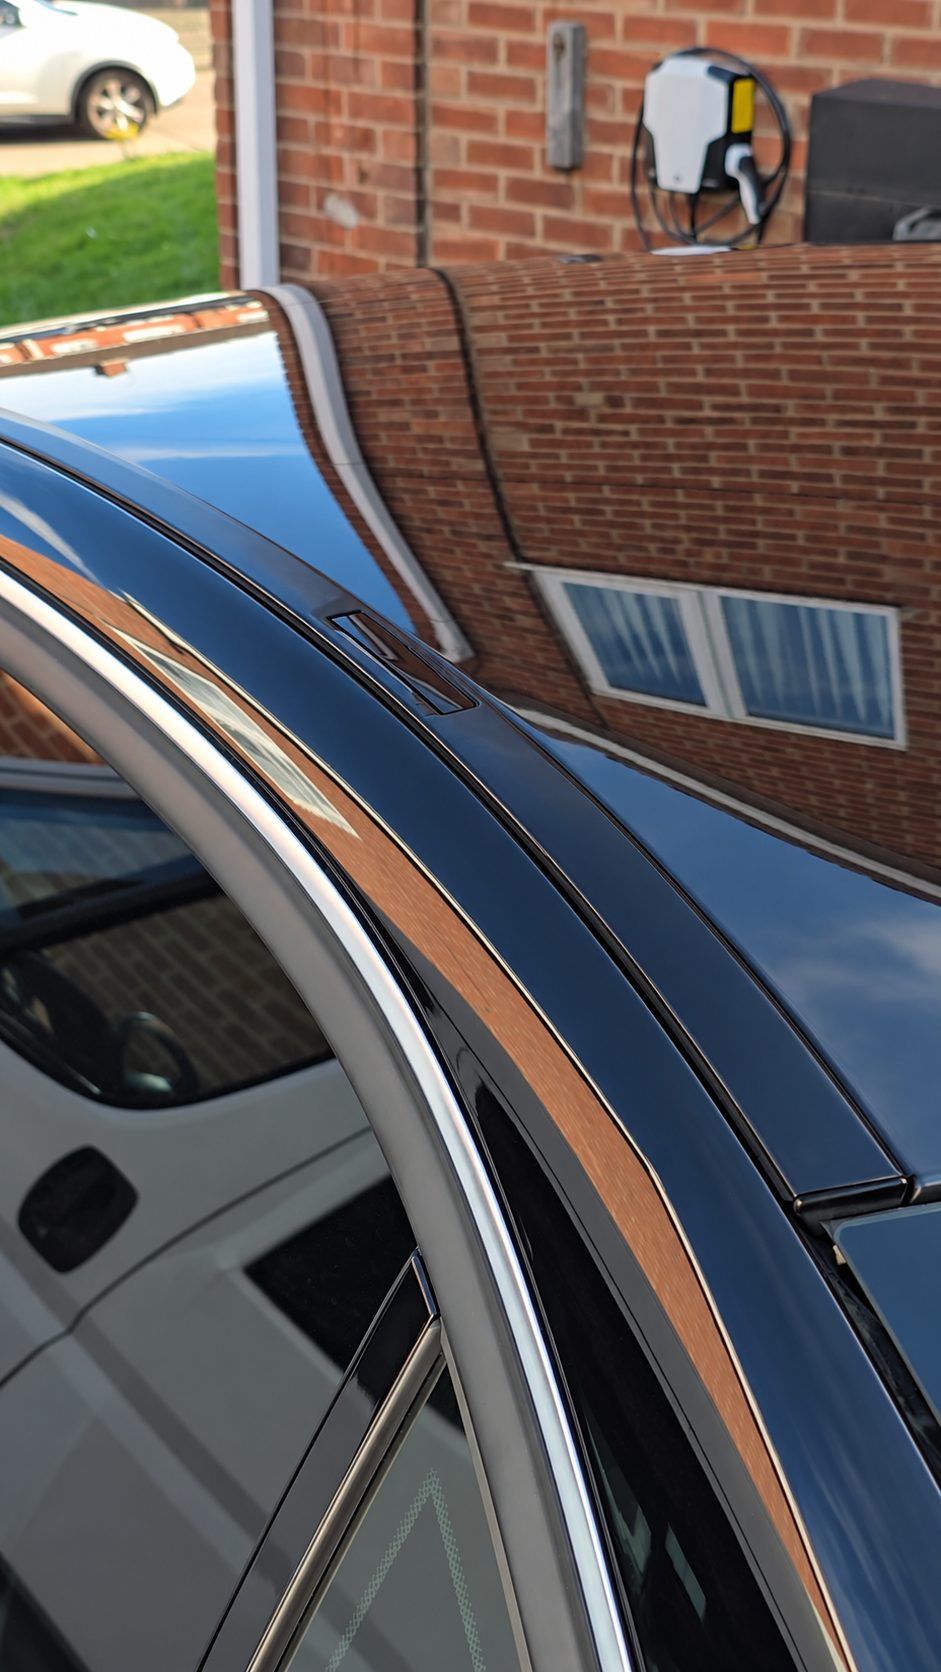
The problem
The black roof trim can suffer lacquer or clear-coat failure as it ages. Once the coating starts lifting, painting over it won’t produce a durable finish. The loose material has to come off and the remaining edges need to be feathered into a properly prepared surface.
What you need
- Masking tape, paper or film to protect nearby paint, glass and seals
- Wet-and-dry paper or other suitable abrasives
- Panel wipe or degreaser and clean microfibre cloths
- Primer suitable for the trim and chosen paint system
- Gloss black automotive paint
- Clear coat when using a basecoat-and-clear system
- Gloves and suitable basic personal protection
Step-by-step process
- 01Inspect the failed finish
Check that the problem is peeling lacquer or failed finish rather than cracked, distorted or otherwise damaged trim.
- 02Remove the roof trim
Work carefully around the clips, glass and seals. W204 production details can vary, so use the video as a visual reference and don’t force a trim that isn’t releasing as expected.
Removal micro-guide
How to Remove the W204 Roof Trim
The Short shows the trim removal in context. Work carefully along the strip, protect the glass and paint, and don’t force a section that hasn’t released.
- 03Remove the loose lacquer
Take off every loose or flaking edge. Fresh paint can’t hold a failing layer together underneath.
- 04Sand and feather the surface
Flatten the damaged area and blend the transition into sound material without changing the trim profile.
- 05Clean and degrease
Remove the dust, use panel wipe or a suitable degreaser, then avoid touching the prepared face with bare fingers.
- 06Prime and refinish
Use compatible primer where the paint system requires it, followed by controlled light coats of gloss black automotive paint and clear coat where applicable.
- 07Allow the finish to cure
Follow the paint manufacturer’s flash-off and curing times. Refine the finish only once it has fully cured and only if the result needs it.
- 08Refit and inspect
Refit the trim carefully, check its alignment and seals, then inspect the finish from several angles in good light.
Refit micro-guide
How to Refit the W204 Roof Trim
Once the finish has cured, refit the strip carefully and check that it sits evenly along the roof gutter without disturbing the surrounding seals.
The finished result
When the underlying trim is still sound, this is a relatively low-cost cosmetic repair. Restoring the deep black finish makes a surprisingly large difference to the appearance of an older W204 without the expense of replacing serviceable original parts.
For the wider principles behind this work, read SMART Repair & Minor Paint Repair, Machine Polishing a Car for Beginners and Safe Car Washing & Basic Detailing.